
Let’s be clear: starting a blog in 2025 is not the same as it was a decade ago. The digital landscape is more crowded, AI is generating content at an unprecedented rate, and the old advice to “just write about your passion” is a fast track to obscurity. This new reality often leads to “analysis paralysis”—an overwhelming state of confusion about hosting, niches, SEO, and monetization that stops most potential bloggers before they even begin.
But here is the truth: the opportunity has not vanished; it has simply evolved.
Today, success is no longer reserved for the lucky, but for the strategic. A successful blog is no longer just a passion project; it’s a lean, focused media asset built on a solid technical foundation and an intelligent, authority-driven content strategy. The barrier to entry isn’t technical skill—it’s possessing the right plan.
This is that plan.
This is not a collection of abstract tips or outdated tactics. This is “The Ultimate 2025 Blueprint,” a comprehensive, step-by-step operational guide to building a successful blog from the ground up. We will cut through the noise and provide a clear, actionable path—from demystifying the initial technical setup to crafting your first high-ranking post and establishing a clear path to monetization.
If you are ready to stop researching and start building, your blueprint begins now.
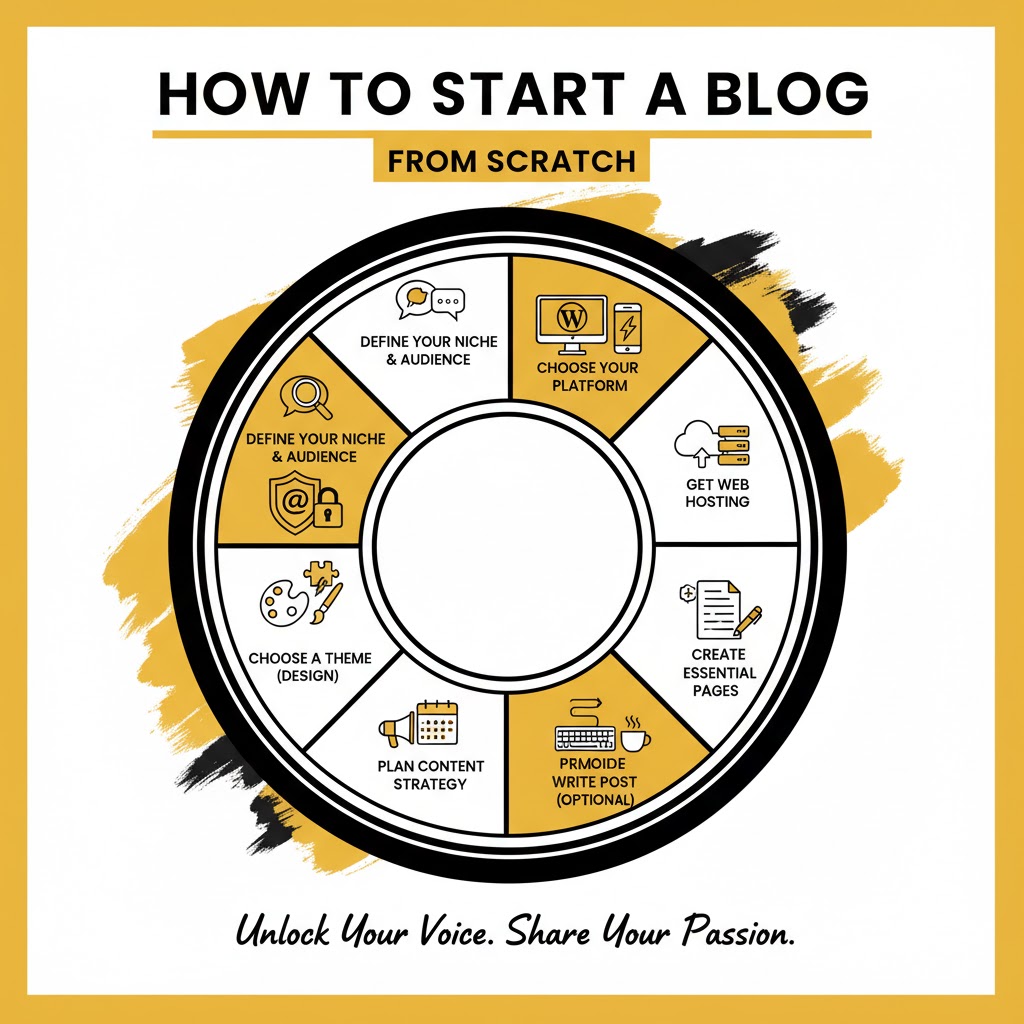
The Ultimate 2025 Blueprint: How to Start a Blog from Scratch (and Actually Make It Successful)
You have a story to tell. An idea to share. A passion you want to turn into a profession. You’ve seen others do it—build vibrant communities, create six-figure incomes, and work from anywhere with just a laptop and an internet connection.
You want to start a blog.
But let’s be honest. The idea is thrilling, but the process is terrifying.
You’re immediately drowning in questions. What’s a “niche”? What’s “hosting”? What’s the difference between WordPress.com and WordPress.org? How do you design it? What do you even write about? And how, in a world with millions of blogs, will anyone ever find yours?
It’s overwhelming. It’s “analysis paralysis,” and it’s the number one reason most potential bloggers quit before they even write a single word.
This guide is the cure for that.
This is not a 500-word list of “tips.” This is the definitive, step-by-step blueprint. We are going to walk through every single decision, every technical click, and every strategic choice you need to make—from a blank screen to a fully functional, beautiful, and monetizable blog.
I won’t just tell you what to do. I will tell you why you’re doing it. No tech-speak, no confusing jargon. Just a clear, proven roadmap.
Starting a blog is a marathon, not a sprint. But this guide is your guarantee that you’ll be starting on the right track, with the best foundation, aimed squarely at success.
Your story is waiting. Let’s start building its home.
Part 1: The Foundation (Before You Spend a Dime)
Before you buy a domain or look at a single line of code, you need to lay the strategic groundwork. Skipping this step is like building a house without a blueprint.
Step 1: Find Your “Why” and Your Profitable Niche
This is the most important step of the entire journey.
A blog without a clear purpose is just a public diary. A blog with a defined niche is a resource, a brand, and a potential business. Your niche is the intersection of three critical circles:
- Your Passion: What could you talk about for 500 articles? What subject do you read about in your free time? If you’re not genuinely interested, you will burn out.
- Your Expertise: What do you know more about than the average person? This doesn’t mean you need a Ph.D. Your “expertise” could be your journey learning something (like your journey out of debt, or learning to bake sourdough).
- Market Demand: Are other people actively searching for this topic? Is there an audience for it? (We’ll cover how to check this in a moment).
The magic happens when these three overlap. Passion without expertise is shallow. Expertise without passion is dry. And both, without market demand, mean you’re writing for an audience of one.
The “Niche Down” Strategy: Your Secret Weapon
Most new bloggers fail because their niche is too broad. You cannot win by starting a “food blog.” You can win by starting a “30-minute vegan meal prep blog for busy professionals.”
You cannot win by starting a “fitness blog.” You can win by starting a “post-partum fitness blog for new moms.”
You cannot win by starting a “travel blog.” You can win by starting a “budget travel blog for college students in Southeast Asia.”
See the difference? A narrow niche does two things:
- It eliminates your competition. You’re no longer competing with all food blogs, just a handful in your micro-category.
- It attracts a loyal, specific audience. A busy professional who wants vegan recipes will find your blog and think, “This was made for me.” They will subscribe instantly.
How to Validate Your Niche
Don’t just guess. Do a 5-minute search.
- Google: Type your niche idea into Google. Do other blogs show up? Are there ads? Ads are a good sign. It means money is being spent, which means there is a market.
- Keyword Tools: Use a free tool (like Google’s own Keyword Planner or other popular free keyword research tools) and type in your main topics. Are people searching for it?
- Competitor Check: Look at the other blogs in your niche. What are they writing about? What are they missing? Your blog’s purpose should be to fill that gap.
Take your time here. Get this right, and everything else becomes 100 times easier.
Part 2: The Technical Setup (The 60-Minute Blog Launch)
This is the part that scares most people. It shouldn’t. It’s gotten incredibly simple. We are going to get your blog live on the internet in under an hour.
Step 2: Choosing Your Blogging Platform (The Most Important Decision)
A blogging platform is the Content Management System (CMS) for your site. It’s the “operating system” that lets you write posts, add images, and change your site’s design without knowing how to code.
You have many options, but there is only one correct choice.
The Trap of “Free” Platforms (Wix, Blogger, WordPress.com)
You’ll see ads for “free” blogging platforms like Wix, Blogger, or the free version of WordPress.com. Avoid these at all costs.
It’s a trap. They are “free” in the same way a cot in someone else’s living room is “free.”
- No Control: You don’t own your site. They can shut you down at any time, for any reason.
- Ugly Domain: Your address will be
myblog.wix.comormyblog.blogspot.com. This is unprofessional and screams “hobbyist.” - No Monetization: You are severely restricted in how you can make money. Many forbid display ads or affiliate links.
- No Customization: You are stuck with their limited set of tools and designs.
The Professional’s Choice: Self-Hosted WordPress (WordPress.org)
Over 43% of the entire internet runs on WordPress.org. Let that sink in.
This is the “self-hosted” version, which means you download the (free) WordPress software and install it on your own little piece of the internet (your web hosting).
Why it’s the undisputed king:
- Full Ownership: It’s your blog. You own the files, the data, and the content. You can never be shut down.
- Total Customization: You have access to over 60,000 free plugins and 10,000+ themes. If you can dream it, you can build it.
- Unrestricted Monetization: You can run any ads, use any affiliate links, sell any products. There are zero restrictions.
- Professional Branding: You use your own custom domain name (like
myawesomeblog.com) from day one. - Scalability: It can grow with you, from one post to ten thousand.
From this point forward, this guide assumes you have made the smart choice: a self-hosted WordPress.org blog.
Step 3: Your Domain Name and Web Hosting (Your Address & Land)
To get your self-hosted blog online, you need two things. This analogy makes it simple:
- Domain Name: This is your blog’s address (e.g.,
google.com). It’s how people find you. - Web Hosting: This is the plot of land on the internet where your blog’s files, images, and posts “live.”
You buy your domain (an annual fee, usually around $10-$15) and your hosting (a monthly or annual fee). Good news: Almost every major hosting provider now gives you a free domain name for your first year when you buy hosting.
How to Choose a Killer Domain Name
- Stick to .com: It’s the most trusted and recognized extension.
- Keep it Simple: Make it easy to spell and easy to remember.
- Avoid Hyphens & Numbers:
my-best-blog-123.comlooks spammy and is hard to type. - Brandable vs. Keyword-Rich: You can go for a brandable name (
nerdwallet.com) or a keyword-rich name (minimalistbaker.com). Both work. A brandable name gives you more flexibility to pivot later.
Demystifying Web Hosting: What You Actually Need
Hosting is your biggest (and only major) startup cost. It can range from $3/month to $500/month. As a beginner, you only need one thing: Shared Hosting.
This means you “share” a powerful server with other websites. It’s incredibly cheap and more than powerful enough for your first 1-2 years.
What to look for in a host:
- One-Click WordPress Install: This is non-negotiable. It makes setup automatic.
- Free SSL Certificate: This encrypts your site (giving you
https://instead ofhttp://). It’s essential for security and Google rankings. - 24/7 Customer Support: When you’re new, you will have questions. Good support (especially via live chat) is a lifesaver.
- Good Uptime: Look for a 99.9% uptime guarantee. This means your site will almost never be “down.”
- Free Domain: Why pay $15 extra if you don’t have to?
There are many fantastic, reputable hosting providers. Do a quick search for “best WordPress hosting for beginners” and you will see the same 3-4 names at the top of every list. Choose one, select their basic shared plan, and let’s move on.
Step 4: The 10-Minute WordPress Installation
This is the moment of truth. You’ve purchased your hosting plan and secured your free domain. Now what?
Inside your new hosting account dashboard, you’ll see a control panel (often called “cPanel”). It looks intimidating, but you only need one button.
- Log in to your hosting account.
- Navigate to your control panel.
- Look for an icon that says “WordPress,” “WordPress Installer,” or “Softaculous.”
- Click it.
- A setup wizard will appear.
- Choose your domain from the dropdown menu.
- Enter your Site Title (e.g., “Minimalist Baker”).
- Create an Admin Username (NEVER use “admin” – it’s a security risk).
- Create a strong password.
- Enter your Admin Email.
- Click “Install.”
That’s it. Seriously.
In about 60 seconds, the installer will build your site. When it’s done, it will give you your login URL.
It will be: http://www.yourdomain.com/wp-admin
Bookmark this link. Go to it, enter the username and password you just created, and welcome. You are now inside the WordPress Dashboard. You are officially a blogger.
Part 3: Configuring Your New Blog for Success
You’ve built the house. Now it’s time to arrange the furniture and install the security system. These “first 30 minutes” settings are critical for your blog’s future.
Step 5: Your “First 30 Minutes” Essential WordPress Settings
From your new WordPress Dashboard (the black menu on the left), we’re going to knock out a few one-time tasks.
- Set Your Site Title and Tagline:
- Go to Settings > General.
- Your Site Title is your blog’s name.
- Your Tagline is your one-sentence description (e.g., “Helping new moms get fit in 15 minutes a day”). This is important for SEO.
- Set Your Permalinks (THE MOST CRITICAL SEO STEP):
- Go to Settings > Permalinks.
- By default, WordPress sets your post URLs to something ugly and meaningless, like
yourdomain.com/?p=123. - Change this immediately. Select the option for “Post Name.”
- Now, your post URLs will be clean and SEO-friendly, like
yourdomain.com/my-first-blog-post. - Click “Save Changes.” If you do nothing else, do this.
- Set Your Timezone:
- On that same Settings > General page, set your correct timezone. This ensures your posts are “scheduled” and published at the correct local time.
- Clean House (Delete Default Clutter):
- Posts: Go to Posts > All Posts. You’ll see a default “Hello World!” post. Hover over it and click “Trash.”
- Pages: Go to Pages > All Pages. You’ll see a “Sample Page.” Trash it.
- Plugins: Go to Plugins > Installed Plugins. Some hosts pre-install plugins. You can safely delete most of them (like “Hello Dolly”). We’ll add our own in a minute.
Step 6: Choosing Your “Look” (Installing a WordPress Theme)
A “theme” is the design skin for your blog. It controls the layout, fonts, colors, and overall visual feel. This is the “fun” part, but it’s also a place where beginners make a huge mistake: choosing a theme that is pretty but slow.
In 2025, speed is an SEO feature. A slow, bloated theme will get penalized by Google, and users will leave before it even loads.
Free vs. Premium Themes: A Blogger’s Dilemma
- Free Themes: There are thousands of amazing free themes in the WordPress directory. For 90% of new bloggers, a free theme is all you need.
- Premium Themes: A premium (paid) theme (usually $50-$70 one-time) offers more advanced features, customization, and dedicated customer support.
My advice? Start with a top-tier free theme. You can always upgrade later.
What Makes a “Good” Theme?
- Lightweight & Fast: The theme description should use words like “lightweight,” “performant,” or “fast.”
- Responsive: This is non-negotiable. It means your theme looks perfect on a desktop, tablet, and smartphone.
- Good Reviews: Look for thousands of 5-star ratings.
- Works with the Block Editor: You want a modern theme built for the native Gutenberg (Block) editor.
My Top Theme Recommendations for Bloggers
You can’t go wrong with one of these three. They are widely considered the fastest, most stable, and most customizable free themes on the market:
- Astra
- Kadence
- GeneratePress
How to Install Your New Theme
- From your Dashboard, go to Appearance > Themes.
- Click the “Add New” button at the top.
- In the search bar, type the name of the theme you chose (e.g., “Astra”).
- Hover over the theme and click “Install.”
- After a few seconds, the button will change. Click “Activate.”
Just like that, your blog has a beautiful, professional, and lightning-fast design.
A Quick Guide to the WordPress Customizer
Now, go to Appearance > Customize. This opens a new live-editing panel where you can:
- Upload your Logo: (Under “Site Identity”).
- Change your Colors: Set your brand’s primary and accent colors.
- Change your Fonts: Choose a clean, readable font for your body text (like Roboto, Open Sans, or Montserrat) and a strong one for your headings.
Play around. You can’t break anything. Click “Publish” when you’re happy.
Part 4: Building Your Core (Content & Functionality)
Your blog is set up, and it looks great. Now we need to add the “apps” (Plugins) and the “core rooms” (Pages) before we write our first article (Post).
Step 7: Installing Essential “Must-Have” Plugins
Plugins are “apps” for your website. They add functionality that WordPress doesn’t have by default, like contact forms, SEO guides, and security firewalls.
A Critical Warning: “Plugin Bloat” is your #1 enemy. Do not go on an installing spree. Every plugin you add is more code, which can slow down your site and create security risks. Only install what you absolutely need.
Here is your starter pack. To install them, go to Plugins > Add New, search for the name, click “Install,” and then “Activate.”
- SEO (Your Google Translator):
- Plugin: Rank Math (or Yoast SEO).
- What it does: This is your personal SEO coach. It adds a checklist to every post, guiding you on how to optimize your content (keywords, titles, descriptions) to rank higher on Google. It also creates a “sitemap” to help Google find your content. You only need ONE of these. Rank Math is the modern, feature-rich favorite.
- Performance (Your Speed Booster):
- Plugin: WP Rocket (Premium) or LiteSpeed Cache (Free, but only if your host uses a LiteSpeed server) or WP Super Cache (Free).
- What it does: Caching. In simple terms, it creates a “static” copy of your site to show visitors, which is dramatically faster than loading everything from the database every time. This is a non-negotiable for site speed.
- Security (Your Bodyguard):
- Plugin: Wordfence Security.
- What it does: WordPress is popular, which makes it a target. Wordfence builds a firewall around your site, blocks malicious login attempts, and scans your files for malware. The free version is incredibly powerful.
- Backups (Your Insurance Policy):
- Plugin: UpdraftPlus.
- What it does: Your host may offer backups, but you must have your own. UpdraftPlus can be set to automatically back up your entire site (files + database) every day and send the backup file to a safe, off-site location like your Google Drive or Dropbox. If your site ever crashes or gets hacked, you can restore it with one click. This is your “undo” button for life.
- Contact Form (Your “Open” Sign):
- Plugin: WPForms Lite.
- What it does: You need a way for readers (and potential partners) to contact you without publishing your email address online. This plugin gives you a simple drag-and-drop builder to create a “Contact Me” form.
- Spam Filtering (Your Bouncer):
- Plugin: Akismet Anti-Spam.
- What it does: The second you go live, spam bots will find you and flood your comments with junk. Akismet (made by the creators of WordPress) is the best in the world at catching and filtering it all automatically.
That’s it. This 6-plugin stack is all you need to run a secure, fast, and optimized blog.
Step 8: Creating Your 4 Essential Core Pages
In WordPress, you have Posts and Pages.
- Posts are your blog articles. They are timely, dated, and show up in a feed.
- Pages are your static, “evergreen” content. They live outside the blog feed, usually in your main navigation menu.
Before you write your first post, you must create your core pages. Go to Pages > Add New for each of these.
- The “About” Page: This is often the second most-visited page on a blog. Pro Tip: Your About Page is not just about you. It’s about what you can do for your reader.
- Good: “I’m Jane, a financial planner. I’ve been doing this for 10 years.”
- Great: “I’m Jane. I help 30-somethings get out of debt and build their first investment portfolio—even if they’re starting with just $100.”
- Include a photo of yourself. People connect with people.
- The “Contact” Page:
- Keep it simple. Write a short sentence (“I’d love to hear from you! Send me a message below…”)
- Then, use your WPForms plugin to add the simple contact form you created.
- The “Privacy Policy” Page (The Legal Must-Have):
- This is a legal requirement in most of the world. It tells users what data you collect (like through cookies or your contact form) and how you use it.
- Pro Tip: WordPress has a built-in generator. Go to Settings > Privacy. You can use their template to create and publish a basic Privacy Policy page in two clicks.
- The “Start Here” Page (Optional but HIGHLY Recommended):
- A “Start Here” page is your blog’s welcome mat. It’s a single page that tells new visitors:
- Who you are.
- What your blog is about.
- Your best cornerstone articles (e.g., “New to baking? Start here…”).
- How they can subscribe.
- This page is fantastic for turning new visitors into loyal fans.
- A “Start Here” page is your blog’s welcome mat. It’s a single page that tells new visitors:
Once these are created, go to Appearance > Menus. Create a “Main Menu,” add these pages to it, and save it. Now they will appear at the top of your site.
Step 9: Writing and Publishing Your First Masterpiece Blog Post
This is the moment. It’s time to move from “blogger” to “author.”
Go to Posts > Add New. Welcome to the Gutenberg Block Editor.
This editor is like digital LEGOs. Every “block” is a different element: a paragraph, a heading, an image, a video, a list. It’s an intuitive, visual way to build beautiful articles.
Anatomy of a Perfect, SEO-Optimized Blog Post
Don’t just write. Structure your post for success.
- The “Skyscraper” Title: Your title is 80% of the battle. It needs to be magnetic, clear, and promise a specific solution.
- Bad: “My Post About Baking”
- Good: “The 10 Beginner Baking Mistakes You’re Probably Making”
- Great: “The Ultimate Guide to Sourdough: A 7-Day Foolproof Plan for Your First Perfect Loaf”
- The “Hook” Introduction (The PAS Formula):
- You have 5 seconds to convince a reader not to leave. Don’t waste it. Use the “Problem, Agitate, Solve” (PAS) formula.
- Problem: “Starting a blog is overwhelming. You’re confused by hosting, plugins, and SEO.”
- Agitate: “This confusion leads to ‘analysis paralysis,’ and most people quit before they even start, letting their great idea die.”
- Solve: “This guide is the cure. We will walk through every single step, from idea to published post, in plain English.”
- Scannable Body Content (The Key to Readability):
- NOBODY reads on the internet. They scan.
- Do not write “walls of text.”
- Use H2 and H3 Subheadings: Break your post into logical, scannable sections (just like this article).
- Short Paragraphs: Keep paragraphs to 1-3 sentences, max.
- Use Lists: Bullet points and numbered lists are your best friends.
- Use Bold Text: Emphasize key takeaways.
- Optimize with Rank Math / Yoast:
- Scroll below your post editor. You’ll see your new SEO plugin’s panel.
- Focus Keyword: Tell it the main phrase you want this post to rank for (e.g., “how to start a blog”).
- Meta Description: Write a 1-2 sentence “ad” for your post. This is what shows up on Google.
- The plugin will give you a Red/Yellow/Green score with actionable tips. Aim for Green.
- Categories vs. Tags (How to Use Them):
- On the right-hand menu, you’ll see “Categories” and “Tags.”
- Categories are your blog’s table of contents. Keep them broad and have only 4-7. (e.g., “Recipes,” “Baking Tips,” “Reviews”). Every post should be in ONE category.
- Tags are your blog’s index. They are micro-topics. (e.g., “sourdough,” “chocolate chip,” “vegan”).
- The Perfect Featured Image:
- This is your post’s “thumbnail.” It shows up on your homepage and on social media.
- Use high-quality, professional-looking images. (You can get millions for free from sites like Unsplash, Pexels, or Canva).
The Pre-Publish Checklist
[ ] Read your post out loud to catch errors.
[ ] Check that all your headings (H2, H3) are structured logically.
[E ] Add your Featured Image.
[ ] Select one Category.
[ ] Add 3-5 relevant Tags.
[ ] Check your Rank Math / Yoast score. Is it green?
[ ] Preview the post. Does it look good on both desktop and mobile?
If yes… take a deep breath.
Click the blue “Publish” button.
Congratulations. You are a published blogger.
Part 5: The Launch & Growth Engine (What to Do After Publishing)
You hit publish. You told your family. You refreshed your page… and… crickets.
This is the moment 90% of bloggers fail. They believe the work is done when they hit publish. The truth is, the work has just begun.
“Build it and they will come” is the biggest lie on the internet.
Your blog is a store in the middle of the desert. Now, you have to build roads to it. This is “Promotion” or “Traffic Strategy.”
Step 10: The Unsexy Truth About Blog Traffic (Promotion)
Your content creation time should be 20% of your effort. Promotion should be 80%. There are three main ways to get traffic.
Strategy 1: The Long Game (SEO)
This is Search Engine Optimization. It’s the art of getting Google to show your post to people who search for your topic.
- How to win: This is what we did in Step 9. You find a “keyword” (what people search for) and create the best piece of content on the internet for that keyword.
- The other half of SEO is “link building.” This is getting other, more authoritative websites to link to your post. This tells Google your content is valuable.
- Timeline: SEO is slow. It can take 6-12 months for a new blog to gain “authority” and start ranking. But it’s 100% passive. A post you write today can bring you traffic for years to come.
Strategy 2: The Short Game (Community & Social)
While you wait for SEO to kick in, you need to go find your readers.
- Pinterest: If your niche is visual (food, fashion, travel, DIY), Pinterest is not social media—it’s a visual search engine. It can send you traffic from Day 1.
- Niche Forums (Reddit, Quora, Facebook Groups): Go to where your target audience already hangs out. Don’t spam your links. Answer questions, be genuinely helpful, and put a link to your blog in your profile or signature.
- Social Media (X, LinkedIn, Instagram): Pick one platform where your audience lives and be an active member of that community.
Strategy 3: The Most Important Game (Email List Building)
This is the single most important asset you will ever build.
You do not own your Google rankings. You do not own your social media followers. An algorithm change can wipe out your traffic overnight.
But you own your email list.
- Why? It’s a direct, unmediated line of communication to your most loyal fans.
- How: Sign up for an email marketing service. Many have free plans for your first 1,000 subscribers (like Mailchimp or ConvertKit).
- The “Lead Magnet”: Don’t just have a “subscribe to my newsletter” box. Offer a bribe. This is your “lead magnet”—a free, valuable PDF you give in exchange for an email.
- Fitness blog: “Free 7-Day At-Home Workout Plan”
- Food blog: “My Top 10 Quickest Recipes (PDF)”
- Finance blog: “The 5-Step Budgeting Spreadsheet”
- Use a plugin to add forms to your site (many email providers have their own) and start building this from Day 1.
Step 11: The Endgame: How to Actually Make Money Blogging
Let’s talk about the final piece of the puzzle: monetization. This is how your blog becomes your business.
Critical Advice: Do not try to monetize on Day 1. It looks desperate and you have no traffic. Focus on building an audience of 1,000 loyal fans first. Create amazing, helpful content. The money will follow.
There are four primary levels of blog monetization.
Level 1: Affiliate Marketing (The Easiest Start)
- What it is: You recommend products you genuinely use and love. If a reader clicks your unique affiliate link and makes a purchase, you get a small commission at no extra cost to them.
- How to start: The Amazon Associates program is the most popular. You can also partner directly with software companies, theme creators, or any product you use.
- The Key: Authenticity is everything. Only recommend products you truly stand behind.
Level 2: Display Advertising (The Passive Income)
- What it is: These are the banner ads you see on blogs. You get paid per 1,000 impressions (views).
- How to start: Google AdSense is the beginner network. Anyone can get in, but the payout is very low.
- The Goal: The “holy grail” for bloggers is premium ad networks like Mediavine, Raptive, or SheMedia. These pay 10x-20x more than AdSense.
- The Catch: They have traffic requirements. Mediavine, for example, currently requires 50,000 sessions/month. This becomes your first major traffic goal.
Level 3: Digital Products (The High-Profit)
- What it is: You create and sell your own product. This is where you have 100% control and keep ~95% of the profit.
- Examples:
- An eBook ($29)
- A set of templates ($49)
- A full online course ($299)
- A premium workshop ($99)
- This is the most scalable and profitable business model for bloggers. You create the asset once, and you can sell it forever.
Level 4: Services (The Quickest Cash)
- What it is: You use your blog as a “portfolio” to sell your time.
- Examples:
- If you have a writing blog, you sell “Freelance Writing Services.”
- If you have a business blog, you sell “Consulting” or “Coaching” calls.
- The Pro: It’s the fastest way to make significant money.
- The Con: It’s not passive. You are still trading time for money. Many bloggers use this to fund their blog while they build their passive income streams.
Conclusion: Your Story Is Waiting
If you’ve made it this far, the “analysis paralysis” should be gone, replaced by a clear, actionable plan.
We’ve covered it all: finding your unique voice in a profitable niche, setting up the technical foundation on the right platform, designing a beautiful and fast site, installing the core plugins for success, and structuring your content to be found.
We’ve also been honest: publishing is just the beginning. The real work is in promotion, in building community, and in having the patience to see it through.
Starting a blog is one of the few things in life where the startup costs are almost zero, but the potential upside is limitless. It’s a vehicle for your creativity, a platform for your voice, and a business you can build from your kitchen table.
You have the blueprint. You have the tools. You have the roadmap.
Your story is waiting. Stop reading, and start building.