
That’s an excellent question! Starting a dropshipping store is a popular way to enter e-commerce with minimal upfront inventory risk.
Here is a professional and detailed introduction to the process of starting a dropshipping store, focusing on the key phases and mindset needed for success:
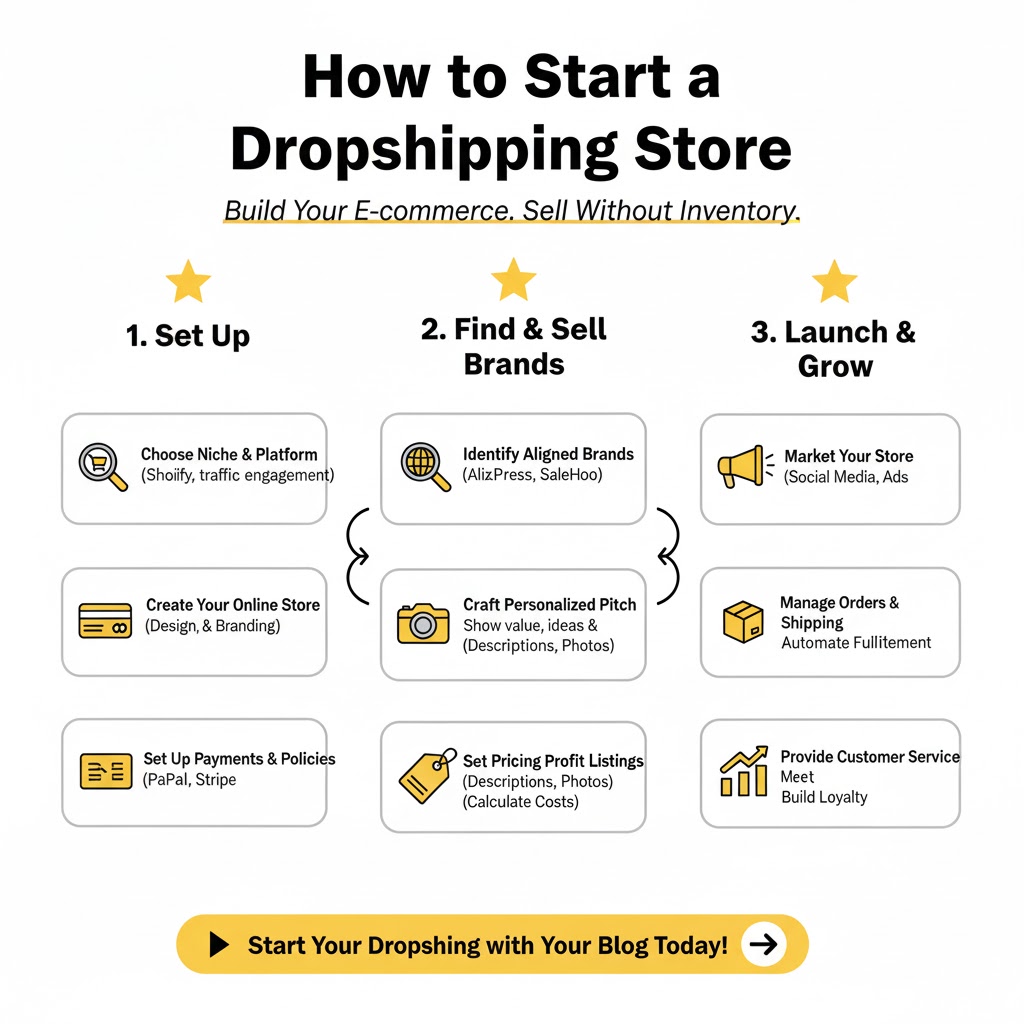
💡 How to Start a Dropshipping Store: A Professional Introduction
Starting a dropshipping store is a multifaceted entrepreneurial journey that requires a blend of strategic planning, meticulous execution, and persistent optimization. It’s not a get-rich-quick scheme, but a legitimate business model where you act as the vital intermediary between customers and wholesale suppliers.
The Dropshipping Model
In the dropshipping model, you never hold inventory. Instead:
- A customer purchases a product from your online store (e-commerce website).
- You purchase the product from a third-party supplier (often overseas or a wholesaler) at a lower cost.
- The supplier ships the product directly to the customer.
Your profit is the difference between your retail price and the supplier’s wholesale price, minus your marketing and operational costs.
The Journey to Launch: A Strategic Overview
Successfully launching a profitable dropshipping store typically involves three core strategic phases:
- Foundation & Niche Selection (The Strategy Phase): This is the most crucial step. Success is rarely about the product itself, but the market. You must identify a profitable niche (a specific, focused product category) and a target audience with an unmet need. This phase includes competitive analysis and validating the demand for your chosen product line.
- Establishment & Branding (The Build Phase): This involves setting up your digital storefront. You will select an e-commerce platform (like Shopify or WooCommerce), design a professional, trustworthy website, and integrate reliable suppliers. Crucially, you must develop a strong brand identity that differentiates you from the thousands of other dropshippers.
- Marketing & Optimization (The Growth Phase): A beautiful store with great products fails without traffic. This phase focuses on driving qualified traffic using paid advertising (e.g., Facebook, TikTok, Google Ads) and organic methods (SEO, content marketing, social media). You must consistently analyze your data (conversion rates, ad spend, customer acquisition cost) to optimize your operations and scale profitably.
The Bottom Line: Treat your dropshipping store as a real brand, not just a storefront. Focus on customer experience, reliable sourcing, and data-driven marketing to build a sustainable and valuable e-commerce business.
Dropshipping Guide
The Bedrock: Advanced Niche, Product, and Market Analysis
Welcome to the definitive guide to building a dropshipping business. Most guides breeze over the first step, “find a product,” as if it’s a simple task. This is a fatal mistake. The truth is that your success is 90% determined before you ever build a website or run an ad. This first chapter is a masterclass in finding, vetting, and validating your foundation.
Chapter 1: The Unfiltered Truth & The Winning Mindset (Why 90% Fail)
Before we discuss “how,” we must discuss “why.” The internet is saturated with videos of 19-year-olds in rented Lamborghinis telling you dropshipping is easy. It is not. It is a low-financial-risk entry into the world of e-commerce, but it is a high-skill, high-effort business model.
If you skip this section, you are setting yourself up to become one of the 90% who quit within three months.
1.1 The “Zero Cost” Fallacy
Dropshipping is advertised as a “no money down” business. This is false.
- Financial Cost: You do not pay for inventory upfront, which is a massive advantage.1 However, you will pay for:
- Platform Fees: Your Shopify or other platform subscription (e.g., $30-$100/month).2
- Domain: Your
.com(e.g., $15/year). - App Subscriptions: Fees for email marketing, review importers, etc. (e.g., $20-$100/month).
- Product Samples: You must order samples to test quality. (e.g., $50-$200).
- Advertising Budget: This is the big one. You will need, at minimum, $300-$500 to test your first product, with no guarantee of a return. You are not spending; you are buying data.
- Time Cost: This is the real startup cost. Expect to spend 40-60 hours building your store, researching your product, and learning advertising platforms before you make your first sale. Once you’re live, it’s another 10-20 hours a week, minimum.
1.2 Dropshipping is a Fulfillment Model, Not a Business Model
This is the most important concept to grasp.
- Your Business is Not Dropshipping.
- Your Business is Marketing & Brand Building.
Amazon, Walmart, and thousands of other companies “dropship” products from third-party logistics (3PL) warehouses. The act of not holding inventory is simply a fulfillment method. Your business is your ability to find a target customer, get their attention, build trust, and persuade them to buy. Your product is your brand, your customer service, and the ad creative you make. The physical item is just the thing you happen to sell.
1.3 The “Shiny Object” Syndrome
You will launch your first product and run ads. It will likely fail. You will see another “winning product” on TikTok and be tempted to jump ship, build a new store, and try again. This is the failure loop.
Success comes from iterating, not restarting. It comes from analyzing why the product failed.
- Was it the product itself?
- Was it the ad creative?
- Was it the landing page?
- Was it the price?
A successful entrepreneur tests one variable at a time. A failed dropshipper tests a new business every week. Commit to a niche, or at least a product, for long enough to genuinely prove it cannot work before moving on.
Chapter 2: Advanced Niche Selection (Beyond “Follow Your Passion”)
“Follow your passion” is lazy advice. Your passion might be 18th-century poetry, which has an audience of zero with purchasing intent. We are looking for the intersection of Audience, Profitability, and Sustainability.
2.1 The Niche vs. The Product
- Product-First (General Store): You create a store like “https://www.google.com/search?q=CoolGadgetFinds.com” and test 10 different unrelated products, from a posture corrector to a galaxy projector.
- Pro: Allows for rapid testing of multiple “winning product” trends.
- Con: Zero brand loyalty. Zero repeat customers. You live and die by ad costs, and your business has a shelf life of a few months.
- Niche-First (Niche Store): You create a store like “https://www.google.com/search?q=TheErgoOffice.com” and sell ergonomic mice, standing desks, posture correctors, and lumbar support cushions.
- Pro: Builds a real brand. You can capture emails and sell multiple products to the same customer (high Lifetime Value – LTV). You build authority and trust.
- Con: Slower start. Requires more upfront research to validate the entire audience, not just one product.
Recommendation: Start with a Niche Store. It’s more work, but it’s the only path to a sustainable, long-term asset. A general store is a hamster wheel.
2.2 The Three Pillars of a Profitable Niche
Your niche must satisfy these three criteria:
- Purchasing Power: The audience must have disposable income.
- Bad Niche: Gadgets for college students. (Low disposable income).
- Good Niche: High-end golf training aids. (High disposable income).
- Good Niche: Problem-solving items for new homeowners. (Actively spending money on their new environment).
- Problem-Solving (High Intent):
- People buy to solve a pain point. This is the most powerful motivator.
- Niche: Pet Care. Pain Point: “My dog has anxiety when I leave.” Product: Calming pet beds, anxiety-relief toys, treat-dispensing cameras.
- Niche: Kitchen. Pain Point: “I hate chopping vegetables.” Product: The 10-in-1 vegetable chopper.
- Niche: Home Office. Pain Point: “My back hurts from sitting.” Product: Ergonomic seat cushions.
- Hobbyist / Passion (High LTV):
- This is the “rabid fan” niche. People spend irrational amounts of money on their hobbies.
- Examples: Fly fishing, specialty coffee brewing, miniature painting, cycling, rock climbing, knitting.
- The “look” and “feel” of your brand (your branding) is 90% of the battle here. You must look like an insider, not a tourist.
2.3 Market Trajectory Analysis (Google Trends Deep Dive)
Don’t just look at a keyword. Analyze its behavior.
- Fad (e.g., “Fidget Spinners”): Looks like a sheer cliff up and a sheer cliff down. Avoid at all costs. You will be left holding the bag.
- Trend (e.g., “Air Fryer”): A sharp, fast rise that then stabilizes at a new, high baseline. These are great to ride.
- Seasonal (e.g., “Christmas Decorations”): Massive peaks and valleys every 12 months. A great business, but you must plan your cash flow for the 8-9 months of the off-season.
- Stable Growth (e.g., “Home Brewing Kit”): A slow, steady, upward climb over 5+ years. This is the holy grail. It shows sustained, organic interest that you can build a long-term brand around.
Action: Go to Google Trends and type in your top 5 niche ideas. Set the range to “Past 5 Years” and “Worldwide.” The graph will tell you the story of that market.
Chapter 3: The Product Validation Gauntlet (A 12-Point Vetting System)
This is the core of Part 1. You must be ruthless. Do not fall in love with your product idea. Make it survive this gauntlet. If it fails even one of these checks, find another product.
3.1 Where to Find Product Ideas (The Idea Funnel)
You don’t “invent” ideas; you “observe” what is already working.
- The TikTok Method:
- Go to the TikTok search bar. Do not search for products.
- Search for problem-based phrases: “kitchen hacks,” “things I wish I bought sooner,” “Amazon must-haves.”
- Look for videos with 1M+ views. What products are being featured? This is proof of a “Wow” factor. The algorithm has already validated that the product can stop a scroll.
- The Meta Ad Library Method:
- Go to the Facebook (Meta) Ad Library.
- Search for keywords related to your niche (e.g., “golf training”).
- Filter by “Active Ads.”
- Look for ads that have been running for more than 3-4 weeks. This is the secret. Advertisers do not run unprofitable ads for a month. This is proof that a product is selling, right now.
- The “Niche Subreddit” Method:
- Go to Reddit and find your niche’s subreddit (e.g.,
r/golf,r/Coffee,r/SkincareAddiction). - Sort by “Top – This Year” or search for “help,” “frustrated,” “wish.”
- Read the complaints. What problems do they have that aren’t being solved? What products do they wish existed? This is how you find gold.
- Example: In
r/homeoffice, you might see 100 posts complaining about cable management. That’s your cue to find the best cable management solutions.
- Go to Reddit and find your niche’s subreddit (e.g.,
3.2 The 12-Point Gauntlet
Your product must pass all 12 checks.
- Is it a “Wow” Product? (The Scroll-Stop Test)
- Does it have a clear, visual hook? Can you demonstrate its value in 3 seconds?
- Pass: A vegetable chopper instantly dicing an onion.
- Fail: A generic vitamin bottle.
- Is it a Problem-Solver? (The “Vitamin vs. Painkiller”)
- A vitamin is “nice to have.” A painkiller is “need to have.” Sell painkillers.
- Pass: A posture corrector that stops back pain. (Painkiller)
- Fail: A nice-smelling candle. (Vitamin)
- Is it a “Secret” Product? (The Local Store Test)
- Can your customer walk into a local store and buy this exact item?
- Pass: A specialized, 7-in-1 kitchen tool not carried by major retailers.
- Fail: A standard spatula, phone case, or t-shirt.
- Does it have High Perceived Value?
- The customer must feel like the product is worth more than its price.
- Pass: A sleek, metal, weighted “luxury” pen.
- Fail: A flimsy piece of plastic.
- The 3.5x Markup Rule (The Profit Margin Test)
- This is the non-negotiable math.
Landed Cost = Product Cost + Shipping Cost to CustomerSale Pricemust be at least3.5 * Landed Cost.- Example:
- Product from supplier: $8
- Shipping (e.g., ePacket): $7
- Landed Cost: $15
- Minimum Sale Price: $15 * 3.5 = $52.50 (You would sell for $54.99)
- Why so high? This $40 margin has to pay for your ads, platform fees, potential refunds, and your profit. If you only have a 2x markup, your ad spend will leave you with nothing.
- The Shipping & Durability Test (No-Go Zones)
- Avoid these categories like the plague:
- Heavy/Large: Shipping costs will destroy your margin.
- Fragile: Glass, ceramics. They will arrive broken. Refunds will kill you.
- Complex Electronics: High failure rate.
- Batteries: Shipping restrictions and fire hazards.
- Consumables (for beginners): Skincare, supplements. High legal/liability risk.
- Is it Broadly Targetable?
- Does the product appeal to a massive audience that can be “niched down”?
- Pass: A dog product. Broad Audience: “Dog Lovers” (100M+ people). Niche Targets: “Golden Retriever Owners,” “People interested in Petco,” “Followers of The Dogist.”
- Fail: A product for left-handed, elderly dentists. The audience is too small to target.
- Is it Scalable (Is there a “Product Ladder”)?
- Can you sell more things to the same customer?
- Pass: You sell a high-end coffee grinder. Your follow-up products are: specialty filters, a gooseneck kettle, premium beans.
- Fail: A one-off viral gag gift. There is no follow-up.
- Does it have High Content Potential? (The Ad Factory Test)
- Can you brainstorm 10 different video ad ideas for this product?
- Pass: A vegetable chopper. (Ad 1: “Save time.” Ad 2: “Perfect dice.” Ad 3: “Stop crying from onions.” Ad 4: “ASMR chopping video.”)
- Fail: A simple poster.
- Is it Trending Up, Not Out?
- Use the Google Trends analysis from Chapter 2. Is this product part of a stable, growing market, or is it a fad?
- Is it Legally Safe? (The “Ban Hammer” Test)
- Does it infringe on any copyright or trademark? (e.g., anything with Disney, Nike, etc.)
- Is it a weapon or related item?
- Is it drug paraphernalia?
- Is it an “adult” item?
- Result: These will get your ad accounts and payment processors (PayPal, Stripe) banned permanently.
- The Passion/Expertise Test (The Final Tie-Breaker)
- Do you have at least a moderate interest in this niche?
- If you’re stuck between “fishing lures” and “baby products,” and you hate fishing, choose the baby products. Your lack of authenticity will be obvious, and you will burn out creating content for a niche you despise.
Chapter 4: Deep Competitive Analysis (Spying for Profit)
Your competition has already spent thousands of dollars finding out what works. Your job is to analyze their data and use it for free.
4.1 Level 1: The Google & Amazon Autopsy
- Search for your product on Google. Who are the top 5 non-Amazon stores?
- Search for it on Amazon. Find the top 3 listings.
- Your Mission: Read the 1, 2, and 3-star reviews.
- This is a goldmine of customer pain points.
- “It broke after one week.” -> Your marketing angle: “Durable, reinforced, and built to last.”
- “The instructions were confusing.” -> Your marketing angle: “Includes a free 5-minute video quick-start guide.”
- “Shipping took 4 weeks.” -> Your marketing angle: “Ships from our US warehouse.” (Even if it doesn’t, you now know this is a key pain point to address).
4.2 Level 2: The Meta Ad Library Takedown
This is the most powerful research tool in e-commerce.
- Go to the Meta Ad Library.
- Search for the name of the competitor stores you found in Level 1.
- Filter by “Active Ads.”
- Analyze their “Winners” (Ads running for 3+ weeks):
- The Hook (First 3 Sec): How do they stop the scroll? Is it a problem? A “wow” demo?
- The Ad Copy: What is their primary “big idea” or promise? (e.g., “The Last [Product] You’ll Ever Need”). What is their Call to Action (CTA)? What emojis are they using?
- The Creative: Is it a simple “User Generated Content” (UGC) phone video? A polished demo? A slideshow of images?
- The Offer: Is it “50% Off,” “Buy 2 Get 1 Free,” or “Free Shipping”?
You are not looking to copy. You are looking to pattern-match. You are building a “swipe file” of proven ad concepts that you will later model and improve.
4.3 Level 3: Reverse-Engineering Their Sales Funnel
Now, become their customer (almost).
- Go to their website from their ad.
- Analyze the Landing Page:
- What is the headline?
- What is the price?
- What trust badges do they use? (e.g., “30-Day Guarantee,” “Free Shipping”).
- How are their reviews laid out? Are they using photo/video reviews?
- Add the Product to Your Cart.
- What happens? Is there an “upsell” pop-up? (e.g., “Add a 2nd one for 50% off!”).
- What about a “cross-sell”? (e.g., “People who bought this also bought [Accessory]”).
- Go to Checkout. Fill in your info. Stop before paying.
- This is an Abandoned Checkout.
- Wait.
- Now, you just sit back and let their entire email marketing funnel come to you.
- Email 1 (1 hour): “Did you forget something?”
- Email 2 (24 hours): “Here are 5 reasons people love [Product].” (Social Proof)
- Email 3 (48 hours): “Here’s a 10% discount to finish your order.” (The Offer)
You have just reverse-engineered their entire business model, ad strategy, pricing, and retention funnel… for free. You now have a proven blueprint to follow.
The Machine: Building Your High-Conversion E-commerce Store
Now, we must build the “machine” that will sell it. This is not just a website; it’s a 24/7 automated sales funnel. A single missing element—a slow page, a missing trust badge, a confusing checkout—can cause a 50% drop in sales. This chapter is a masterclass in building a store that converts.
Chapter 5: Platform, Brand, and Legal Foundation
Before we add a single product, we must build the “box” it will live in. This includes your platform, your brand identity, and the legal pages that make you a legitimate business.
5.1 Your Platform: Why Shopify is the Uncontested Choice
There are many e-commerce platforms: WooCommerce, BigCommerce, Wix, Squarespace. For dropshipping, 99% of successful stores use Shopify. Here’s why:
- Ease of Use: It’s built for non-technical beginners. You can build a world-class, secure, and fast store without writing a single line of code. With WooCommerce (on WordPress), you are your own IT department, responsible for security, hosting, speed, and plugin conflicts.
- The App Ecosystem: This is the real secret. Shopify’s App Store is like Apple’s. Need to import reviews? There’s an app. Need to connect to your supplier? There’s an app (like DSers). Need advanced email marketing? An app. This ecosystem saves you hundreds of hours.
- Scalability & Security: You never have to worry about your server crashing during a Black Friday sale. Shopify handles all hosting and security. Their checkout is one of the most trusted and optimized in the world, handling billions in transactions.
- Integration: Every major supplier, payment processor, and marketing tool (Facebook, Google, TikTok) integrates natively with Shopify, making your life infinitely easier.
The Choice: Do not waste weeks trying to save $20/month with a “cheaper” alternative. Your time is worth more. Get the basic Shopify plan. It’s all you need to start.
5.2 Naming, Domain, and Brand Identity
Your name matters. It’s the first signal of trust.
- Avoid “Hyper-Niche” Names: Don’t name your store
BestDogBeds.com. What happens when you want to sell dog leashes or toys? You’re stuck. - Choose a “Brandable” Niche Name: Name the audience or the feeling.
- Product: Calming Dog Bed
- Bad Name:
CalmingBedStore.com - Good Name:
PawsAndComfort.com,TheCozyCanine.com,ZenPet.co
- The Domain:
- Always aim for a
.com. It has the highest trust. - If
.comis taken,.cois the next best. - Avoid
.shop,.store,.bizetc. They look cheap and untrustworthy. - Keep it short, memorable, and easy to spell.
- Always aim for a
5.3 Your “Brand in a Box” (For Under $50)
You need to look like a million-dollar brand, even if you’re a one-person operation.
- Logo: Go to Canva (a free tool).
- Do not use a complex, illustrative logo.
- Use a clean, premium-feeling text-based logo.
- Find two fonts that work well together (a “serif” font for class, a “sans-serif” for modern).
- Example: ZEN PET (in a clean, wide font). That’s it.
- Make a square version (for social media) and a wide version (for your website header).
- Color Palette:
- Again, use Canva or a free tool like
coolors.co. - Choose 2-3 colors and stick to them.
- Primary Color: Your “brand” color (e.g., a calm blue or green).
- Secondary Color: A neutral (light gray, black, white).
- Accent/CTA Color: This is your “Call to Action” color (e.g., a bright orange, yellow, or green). This color should be used only for “Add to Cart” and “Checkout” buttons, to draw the eye.
- Again, use Canva or a free tool like
You now have a name, a logo, and a color palette. You have a brand identity.
Chapter 6: Building the High-Conversion Store (Shopify Deep Dive)
This is the tactical, step-by-step build.
6.1 Theme Selection: Free vs. Paid
Your Shopify “theme” is the visual template of your store.
- Free Themes (e.g., Shopify’s “Dawn” or “Sense”):
- Pros: They are free, well-coded, and fast.
- Cons: They are basic. They lack many built-in conversion features (like countdown timers, advanced product page layouts, “quick add” features), forcing you to buy 5-10 extra apps that slow down your site.
- Paid/Premium Themes (e.g., “Impulse,” “Prestige,” or themes from ThemeForest):
- Pros: They have conversion features built-in. This saves you app fees and, most importantly, keeps your site fast by not relying on 10 different pieces of code. They look far more professional and trustworthy out of the box.
- Cons: They cost money ($180 – $350 one-time).
Recommendation: If you can afford it, buy a premium theme. A one-time $250 investment in a fast, feature-rich theme will pay for itself in the first week through a higher conversion rate. If you are on a tight budget, the free “Sense” theme is the best starting point.
6.2 The Anatomy of a Perfect Homepage (Building Trust)
The homepage’s job is not to sell products. Its job is to build trust, establish your brand, and get the visitor to click on a product page.
- The “Above the Fold” Hero Section:
- A high-quality, professional “lifestyle” image that evokes the feeling of your brand. (e.g., for
ZenPet.com, a beautiful photo of a happy dog sleeping peacefully). - Headline (Your Value Proposition): “The Comfort Your Best Friend Deserves.”
- Sub-headline (What you do): “Premium, anxiety-reducing pet beds and accessories.”
- Primary CTA Button: “Shop The Collection” (This button should be your “Accent Color”).
- A high-quality, professional “lifestyle” image that evokes the feeling of your brand. (e.g., for
- “As Seen On” / Social Proof Bar:
- A simple bar below the hero image.
- Even if you haven’t been “seen on” them, you can use logos of payment processors (Visa, PayPal, Amex) and a “SSL Secure” badge. This is a powerful, subconscious trust builder.
- Featured Collections:
- Visually clean links to your 2-3 main product categories (e.g., “Beds,” “Leashes,” “Toys”).
- Featured Best-Selling Product:
- A clean section showcasing your single best product.
- Brand “Why” Section:
- A short, 2-3 sentence paragraph about why you exist.
- “We started ZenPet because our rescue, Buddy, suffered from separation anxiety. We couldn’t find a solution that was both effective and beautiful, so we made our own. We’re dedicated to bringing peace of mind to pets and owners everywhere.”
- This story separates you from all the soulless, generic dropshipping stores.
- Testimonials:
- 3-4 of your best customer reviews (with photos, if possible).
- Email Sign-up:
- “Join the ZenPet Family. Get 10% off your first order and be the first to know about new products.”
- Professional Footer:
- Crucial. Must contain links to your “Trust Pages” (see 6.4).
- Links: Shipping Policy, Refund Policy, Privacy Policy, Terms of Service, Contact Us.
- A clean menu and your logo again.
6.3 The Anatomy of a Perfect Product Page (The “Sale Closer”)
This is the most important page on your entire site. 99% of your ad traffic will land here, not the homepage. It must be a masterpiece of persuasion.
- The Media Gallery (Left Side):
- Images: 5-10 high-quality, un-pixelated images.
- Must Include:
- Clear “white background” product shots.
- “Lifestyle” shots (the product in use, e.g., the dog in the bed).
- “Benefit” shots (e.g., a graphic overlay saying “Machine Washable”).
- “Dimension” shot (an image with the product’s height/width/length).
- Video/GIFs: This is the single best conversion tool. Your first image or a “play” button should lead to a 15-30 second video of the product in action.
- The “Buy Box” (Right Side):
- Product Title: Clear, simple, no “supplier spam.”
- Bad:
New Style Fluffy Warm Pet Bed for Dog Cat S/M/L - Good:
The ZenPet Calming Bed
- Bad:
- Price: Use a “compare-at” price to show a discount.
$79.99(with$159.99crossed out). This instantly frames the value.
- Reviews: A 5-star rating (e.g., “★★★★★ (1,284 Reviews)”) directly under the title. This must link to the review section at the bottom.
- Short Description: 2-3 bullet points of the biggest benefits.
✓ Eases Anxiety:Raised rim supports their head and neck.✓ Pet-Safe Materials:Durable, vegan-friendly faux fur.✓ Easy to Clean:Fully machine washable.
- Variant Swatches: (e.g., “Color,” “Size”). Use color swatches, not a dropdown menu.
- The “Add to Cart” Button:
- Must be your “Accent Color” (e.g., bright green).
- Must be large and unmissable.
- Pro Tip: Add an alternative “Buy with PayPal/Shop Pay” button directly below it. This “Dynamic Checkout Button” lets people buy in one click and can boost conversion by 10-20%.
- The “Trust Stack” (Under the Button): This is non-negotiable.
- A small stack of icons/text:
✓ 30-Day Money-Back Guarantee✓ Free Shipping on all orders✓ Secure, Encrypted Checkout- This stack destroys “Fear, Uncertainty, and Doubt” (FUD) right at the moment of decision.
- Product Title: Clear, simple, no “supplier spam.”
- The Long Description (Below the Fold):
- This is where you tell the full story. Assume the customer is skeptical.
- Use a “Problem -> Agitate -> Solution” framework.
- Headline: “Does Your Dog Suffer from Anxiety?”
- Sub-headline (Agitate): “Millions of dogs experience stress when left alone, leading to destructive behavior and a lower quality of life. Standard pet beds do nothing to help.”
- Solution: “Introducing the ZenBed. We’ve engineered a new type of bed based on behavioral psychology. The raised rim mimics the feeling of a mother’s hug, triggering a deep sense of security…”
- Use GIFs, benefit-led headlines, and clear sections.
- The Social Proof (Reviews):
- This is the final closer. You need a review app (see Chapter 7).
- This section must allow customers to upload their own photos and videos.
- A review that says “My dog loves it” is good.
- A review that says “My dog loves it!” with a photo of their dog sleeping peacefully in the bed is 100x more powerful. It’s an undeniable, authentic testimonial.
6.4 The Essential “Trust Pages” (Legal & Policy)
Do not use fake or copied-and-pasted policies. Shopify has free generators for these, which you should use as a template and then edit to be clear and human-readable.
- Shipping Policy:
- Be brutally honest about shipping times. This is the #1 way to avoid chargebacks.
- Good Example: “Please allow 1-3 business days for order processing. After your order is processed, it will be shipped via our Standard Insured Shipping, which takes an estimated 8-15 business days to arrive. You will receive a tracking number via email as soon as it ships.”
- Refund Policy:
- Offer a 30-Day Money-Back Guarantee. This is a powerful conversion tool.
- State clearly how to start a return (e.g., “Email us at support@zenpet.com”).
- State who pays for return shipping (usually the customer, unless the item is defective).
- Privacy Policy & Terms of Service:
- Use the Shopify generator. These are your legal protection.
- “Contact Us” Page:
- Do not just use a form.
- List a professional email address:
support@zenpet.com(You can create this for free with most domain hosts or via Shopify). - List a response time: “We’ll get back to you within 24 business hours.”
Chapter 7: The Essential App “Stack” (Powering Your Store)
You can’t run a modern store without apps. But too many apps will slow your site to a crawl and cost a fortune. Here is the lean, mean “stack” you need to launch.
7.1 The Core Stack (Non-Negotiable)
- Fulfillment App: DSers (Free – $$$)
- What it does: This is the “bridge” between your Shopify store and your supplier (e.g., on AliExpress).
- Why you need it: When a customer buys from you, you click one button in DSers, and it automatically transfers that customer’s order and shipping information to your supplier and pays them. Without this, you would be manually copy-pasting hundreds of addresses.
- Review App: Loox ($9.99/mo) or Judge.me (Free – $15/mo)
- What it does: Collects and displays product reviews.
- Why you need it: As discussed in 6.3, reviews are the #1 driver of social proof.
- Must-Have Feature: The ability to import reviews from AliExpress (to “seed” your product page before you have your own) and, most importantly, the ability for customers to upload photos/videos. Loox is the industry leader for photo reviews.
- Email Marketing: Klaviyo (Free to start) or Shopify Email (Free to start)
- What it does: Collects emails and sends automated sequences.
- Why you need it: Your profit is in your email list. At minimum, you must set up an Abandoned Cart Flow. This one automation will email customers who almost bought and bring back 10-20% of them, for free. It’s pure profit.
7.2 The “First-Month” Conversion Stack
Once you have your first sales, add these.
- SMS Marketing: Postscript or SMSBump (Pay-per-use)
- What it does: Collects phone numbers and sends abandoned cart texts.
- Why you need it: SMS has a 98% open rate (vs. 20% for email). An abandoned cart text (“Hey, you left this! Here’s 10% off to finish your order: [link]”) is one of the highest-converting automations you can build.
- Upsell/Cross-sell App: OneClickUpsell or ReConvert ($$-$$$)
- What it does: Shows a special offer after the customer buys.
- Why you need it: This is how you increase your Average Order Value (AOV). A customer just bought the dog bed. A “post-purchase” pop-up says: “Wait! Add a matching faux-fur blanket for 50% off (one-time offer)!”
- This is a “zero-friction” sale. They’ve already trusted you. Their payment info is in. They just click “Yes.” This is how stores stay profitable even as ad costs rise.
We have now built our “machine.” We have a legal, legitimate business with a strong brand identity. We have a professional, fast, and trustworthy Shopify store. Most importantly, we have a product page engineered from the ground up to do one thing: convert. We’ve also installed the core “app stack” to automate fulfillment, reviews, and email.
The store is built. The engine is ready. Now, we need fuel. The next part is the most feared and most critical for scaling: Traffic.
The Ad Playbook: Mastering Paid Traffic (Meta & TikTok)
Now, we face the most critical, skill-based challenge: getting targeted traffic. A perfect store with no visitors is a digital ghost.
This chapter is a masterclass in the art and science of paid advertising. We won’t just cover what buttons to click; we’ll cover the deep strategy of why we’re clicking them. We will focus on the two platforms that drive 99% of dropshipping success: Meta (Facebook/Instagram) and TikTok.
Chapter 8: The “Ad Creative” Factory (Your Most Important Asset)
Before you ever open the Ads Manager, you must understand this: The ad creative (the video or image) is responsible for 80% of your success. You cannot target your way out of a bad ad.
Your job is not to sell a product; it’s to sell a solution in a 15-second video that stops someone from scrolling.
8.1 The “Why” of Video
Static images can work, but for dropshipping, video is king.
- It demonstrates the “Wow” factor.
- It shows the product in use, building trust.
- It tells a micro-story (Problem $\rightarrow$ Solution).
- The algorithms on both Meta and TikTok are video-first.
Your goal is to create 3-5 unique video ads before you spend your first dollar.
8.2 How to Create Winning Ads (Without a Hollywood Budget)
You have three primary methods for sourcing and creating ad creatives.
- Method 1: The “Supplier-Sourced” Method (The Quickest Start)
- Your supplier on AliExpress often has videos and photos.
- Action: Download all of them. Use a simple video editor (like CapCut – it’s free and powerful) to re-edit them.
- The Edit:
- NEVER use their video as-is. It’s generic and overused.
- Re-cut it. Make the first 3 seconds a powerful visual hook (e.g., the “problem” or the most satisfying “solution” shot).
- Add text overlays: “Tired of X?”, “The solution you’ve been looking for.”
- Add a trending, copyright-free audio track.
- Add a strong Call to Action (CTA): “Get 50% Off Today!”
- Method 2: The “UGC” (User Generated Content) Method (The Most Authentic)
- This is the gold standard. It’s a video that looks like a real customer filmed it on their phone. It screams authenticity and trust.
- Action (When you have no sales): You have to create it.
- Order the product sample (which you did in Part 1).
- Give it to a friend, or film it yourself.
- Film it vertically (9:16 aspect ratio).
- The Script (AIDA Framework):
- A (Attention): Start with the problem. “My dog used to destroy every bed I bought him…” (Show a ripped bed).
- I (Interest): Introduce the solution. “…until I found this indestructible, calming bed.” (Show the new bed).
- D (Desire): Show the key benefits. “He’s been trying for a week and can’t make a dent. Plus, the calming fur means he’s never been more relaxed.” (Show the dog sleeping peacefully).
- A (Action): “I’m obsessed. Get yours from [BrandName].com. Link in bio!”
- Method 3: The “Hired” Method (The Scaling Accelerator)
- Once you have a proven product, don’t make ads yourself.
- Action: Go to a platform like Bill_o or Creatorly (formerly Insense). These services specialize in finding UGC content creators.
- You send them your product, they have a creator film a high-quality, authentic video for $50-$150.
- This allows you to test 5-10 new ad angles per week, which is the key to scaling.
8.3 The Anatomy of a Winning Ad (The “Hook, Story, Offer” Formula)
Your video must follow this structure, and it all happens in under 30 seconds.
- The Hook (Seconds 0-3): You have 3 seconds to stop the scroll.
- Problem Hook: Show something relatable and frustrating (e.g., a knife failing to cut a tomato).
- “Wow” Hook: Show the most satisfying part of your product (e.g., the vegetable chopper dicing an onion in one tap).
- Social Proof Hook: “This is the #1 reason I’m able to…”
- The Story (Seconds 4-10): Demonstrate the benefits.
- Show 2-3 key features as benefits.
- Feature: “It’s waterproof.” Benefit: “So you can use it in the shower!”
- Feature: “It’s rechargeable.” Benefit: “Saving you money on batteries!”
- The Offer (Seconds 11-15+): The Call to Action.
- Visually show the offer on screen: “50% OFF + FREE SHIPPING”
- “Shop Now” button or text.
- Add urgency (e.g., “Limited Time Offer!” or “While Supplies Last!”).
Chapter 9: Meta (Facebook & Instagram) Advertising Masterclass
Meta is the workhorse of e-commerce. Its algorithm is unparalleled at finding people who are ready to buy. It’s more expensive than TikTok, but the intent of the traffic is often higher.
9.1 The Pre-Flight Checklist (Setting Up for Success)
Before you run an ad, you must have this in place. Failure to do so will get your ad account banned.
- Create a Facebook Business Page: This is the “identity” your ads will run from. Fill it out completely (profile picture, cover photo, “About” section).
- Create a Business Manager (Meta Business Suite): This is the “hub” that will own your Page and your Ad Account.
- Create an Ad Account: This is where you will build campaigns and manage billing.
- Create and Install the Meta Pixel:
- This is the most critical piece of tech. The Pixel is a snippet of code from Meta that you install on your Shopify store (Shopify makes this a simple copy-paste).
- It tracks everything: who visits your site, who adds to cart, and who purchases.
- It “feeds” this data back to Meta’s AI, allowing it to learn who your perfect customer is and find more of them. Running ads without a Pixel is like driving with your eyes closed.
- Verify Your Domain: You must prove to Meta that you own your
.com(Shopify has a simple guide for this). - Configure “Aggregated Events”: Due to Apple’s iOS 14+ privacy changes, you must tell Meta which 8 events are most important to you. You will prioritize them like this:
PurchaseInitiate CheckoutAdd to Cart- View Content…and so on.
9.2 The CBO Testing Strategy (The “Data-Buying” Phase)
Your first $300-$500 is your Data Budget. You are not trying to make a profit. You are trying to answer two questions:
- Does this product sell?
- Which ad creative sells it best?
This is the most common and effective testing structure for dropshippers.
- Campaign Structure: The CBO Test
- Campaign Level:
- Objective:
Sales(This tells Meta’s AI to find buyers, not just clickers). - Budget:
Campaign Budget Optimization (CBO)– ON. - Daily Budget:
$50(or $30 minimum).
- Objective:
- Ad Set Level (The “Who”):
- This is where you define your audience. You will create 3-5 Ad Sets.
- Ad Set 1: “Broad”
- Targeting: USA, 25-65+, Male & Female. No interests.
- Why? You are trusting Meta’s AI. The Pixel is smart. You are telling it, “Here is my product. Find anyone in the US who will buy it.” This often works better than interests.
- Ad Set 2: “Interest Stack 1”
- Targeting: People interested in “Dog Lovers” + “Petco” + “Chewy”
- Ad Set 3: “Interest Stack 2”
- Targeting: People interested in “Golf” + “PGA Tour” + “Callaway”
- Ad Set 4: “Competitor Stack”
- Targeting: People interested in
r/HomeOffice+ “Ergonomics”
- Targeting: People interested in
- Placements:
Advantage+ Placements(Automatic). Let Meta put the ad where it will perform best.
- Ad Level (The “What”):
- Inside each of your Ad Sets, you will put your 3-5 unique video creatives (from Chapter 8) and 1-2 variations of your ad copy (the text).
- Meta will automatically distribute the budget to the Ad Sets and Ads that are getting the best results.
- Campaign Level:
9.3 Reading the Data (The 3-Day Rule)
Let this $50/day CBO campaign run for 72 hours (3 days) without touching it. This is the hardest part. You will be tempted to kill an ad set after 5 hours because it has no sales. Don’t. The algorithm needs time to learn.
After 3 days ($150 spent), you analyze the data.
- Key Metrics to Read:
- CPM (Cost Per 1,000 Impressions): How much it costs to show your ad. High CPM ($50+) can mean your ad is bad or your audience is too small.
- CTR (Link Click-Through Rate): What % of people who saw your ad clicked the link?
Below 1%= Your ad creative (video) is failing. It’s not stopping the scroll. This is your #1 creative problem.1% - 2%= Average.Above 2%= You have a winning creative!
- CPC (Cost Per Link Click): How much each click costs.
Above $2.00= Too expensive. Likely caused by a low CTR.$1.00 - $2.00= Okay.Below $1.00= Excellent.
- ATC (Add to Carts): Are people almost buying?
- CPA (Cost Per Acquisition/Purchase): The holy grail. How much it costs to get one sale.
- The “Kill or Keep” Decisions:
- Is CTR < 1%? $\rightarrow$ KILL THE AD. The creative is bad.
- Is CTR > 1% but no ATCs? $\rightarrow$ You have a Landing Page Problem. People are clicking (the ad works) but they are not buying (the store doesn’t convert). Go back to Part 2. Is your price too high? Is your page slow? Are trust badges missing?
- Are there ATCs but no Purchases? $\rightarrow$ You have a Checkout Problem. Is your shipping too expensive or slow? Is your checkout process broken?
- Are there Purchases? $\rightarrow$ YES! Look at the CPA.
Product Price: $50Landed Cost: $15Profit Margin: $35- If your CPA is $20, you are making $15 profit per sale. THIS IS A WINNER.
- If your CPA is $35, you are breaking even. This is also a winner, as the Pixel is just learning and can be optimized.
- If your CPA is $50, you are losing money. KILL this ad set.
9.4 Scaling (The “Double Down” Phase)
You have a winner! Your Ad Set 2 (Interest Stack 1) is getting a $20 CPA and your Ad Creative 3 (the UGC video) is getting a 3% CTR. Now what?
- Vertical Scaling:
- Take your original winning CBO campaign.
- Turn OFF all the losing Ad Sets and losing Ads.
- Increase the campaign budget by 20% per day. (From $50 to $60, then $72, etc.)
- Why 20%? Any big, sudden budget change will shock the algorithm and force it back into the “learning phase,” destroying your results. Slow and steady wins.
- Horizontal Scaling:
- Duplicate your winning Ad Set 3-5 times into a new CBO campaign.
- Duplicate 1: Keep the same winning interests.
- Duplicate 2: Change the interests slightly (e.g., test different dog breed magazines).
- Duplicate 3: Create a Lookalike Audience (LAA).
- This is the most powerful scaling tool. You tell Meta, “Take all the data from my 100+ ‘Purchasers’ (from the Pixel) and go find 2 million other people in the USA who look exactly like them.”
- This is now your new target audience, and it’s built from your own sales data. This is how you scale to $10k/day.
Chapter 10: TikTok Advertising Masterclass
TikTok is a different beast. It’s a “content-first” platform, not a “social-first” one. Users are there to be entertained, not to talk to their friends. Ads must feel like native, entertaining TikToks.
The Strategy: TikTok is a “top-of-funnel” cannon. You use it to get massive, cheap reach and clicks. Meta is your “bottom-of-funnel” sniper. You use Meta’s retargeting to “clean up” all the people who came from TikTok but didn’t buy.
10.1 The Creative (99% of Success on TikTok)
- It MUST look like a TikTok. Do not use a polished, corporate ad.
- Use a real person (UGC).
- Use TikTok’s native text-to-speech voice.
- Use a trending sound (check the “Commercial” sound library in the ad manager).
- The 3-Second Rule is the 1-Second Rule. The first frame must be visually jarring or intriguing.
10.2 The “Spark Ad” Strategy
This is the single best way to run ads on TikTok.
- Create a normal, organic TikTok account for your brand (e.g.,
@ZenPet). - Post your 3-5 ad creatives as normal, organic videos on that account.
- Wait 24 hours. See which one gets the best organic engagement (views, likes, comments).
- Go into the TikTok Ads Manager. Select “Use TikTok Account to Deliver Spark Ads.”
- You can now “boost” that high-performing organic video as your ad.
- Why this works: The ad shows up as a normal video from a real account, not as a “Sponsored” post. It has social proof (likes, comments) already built-in, and it feels 100% native to the platform, leading to massive CTR and cheap clicks.
10.3 TikTok Campaign Structure (Simpler than Meta)
TikTok’s algorithm is less mature. The best strategy is Broad Targeting.
- Campaign:
- Objective:
Website Conversions - Event:
Complete Payment - Budget: CBO – ON.
$50/dayto test.
- Objective:
- Ad Groups (Ad Sets):
- Ad Group 1: Broad
- USA, 18+, Male & Female.
- Interests: Select 1-2 broad interests (e.g., “Pets” or “Home Improvement”).
- Ad Group 2: Broad
- USA, 18+, Male & Female.
- Interests: Select 1-2 different broad interests (e.g., “Dogs” or “Decor”).
- Don’t over-target. Let the algorithm find the audience.
- Ad Group 1: Broad
- Ads:
- Add your 3-5 (Spark Ad) creatives to each Ad Group.
Let it run for 48-72 hours. The metrics are the same as Meta, but you should expect cheaper CPCs (often $0.30 – $0.80) but a lower conversion rate.
The Golden Combo: Use TikTok for cheap traffic. Use Meta’s Pixel to capture all that traffic and run Retargeting Ads to them on Facebook and Instagram, reminding them (“Hey, you forgot this!”) and closing the sale.
This section covers the “back end” of your business—the systems that run the machine, keep customers happy, and keep you profitable.
Many dropshippers are brilliant at marketing (Part 3) but fail at this stage. A focus on operations and finance is what separates a six-figure flash-in-the-pan from a sustainable, long-term brand.
📖 Dropshipping Guide (Part 4 of 5)
The Business: Operations, Customer Service, and Financial Mastery
You’ve found a product, built a high-conversion store, and the ads are running. The sales are coming in. Congratulations—you are now in the top 10% of starters.
But now, the real work begins. You’ve transitioned from an entrepreneur to a business operator. Your new job is to manage a complex system of suppliers, customers, and cash flow. Failure to master this stage is the #1 reason profitable stores die.
Chapter 11: Operations & Fulfillment Mastery (The Logistics Engine)
This is the mechanical core of your business. Optimizing it saves you time, money, and customer relationships.
11.1 The Order Fulfillment Flow (The First 100 Orders)
Here is the exact step-by-step process for your first orders, assuming you’re using DSers with AliExpress:
- Sale Made: A customer (let’s call her Jane) buys the
$49.99ZenPet Bed on your Shopify store. - Payment Captured: Shopify Payments (or PayPal) processes Jane’s
$49.99and notifies you, “You’ve made a sale!” (This money is not in your bank yet. It’s in a “payout” balance, which can take 2-7 days). - Order Syncs: Your DSers app automatically pulls in the order details: “Jane Smith, 123 Main St, Blue ZenPet Bed.”
- You Take Action (DSers): You log into DSers, go to the “Awaiting Order” tab, and see Jane’s order.
- You Fulfill: You click “Place Order.” DSers automatically:
- Opens AliExpress.
- Adds the correct Blue ZenPet Bed from your vetted supplier to the cart.
- Fills in Jane’s shipping details (123 Main St).
- Takes you to the checkout page.
- You Pay: You pay the supplier their price (e.g.,
$15Landed Cost) with your own credit card. This is a critical concept. You pay the supplier before you receive the customer’s money. - Supplier Processes: The supplier accepts the order and begins to package it (1-3 days processing time).
- Supplier Ships: The supplier ships the package and generates a tracking number.
- Tracking Syncs: DSers automatically detects this tracking number and pulls it back into its system.
- Fulfillment in Shopify: DSers then “marks the order as fulfilled” in Shopify and adds the tracking number to Jane’s order.
- Customer Notified: Your Shopify store automatically sends its “Your Order Has Shipped!” email to Jane, complete with her new tracking number.
Your only manual work was clicking “Place Order” in DSers and paying. With a paid DSers plan, even this can be 100% automated.
11.2 The “AliExpress Problem” and The Solution
This DSers method is great for your first 100 sales. It fails when you hit 30-50 sales per day. Why?
- Slow Shipping: 8-15 days is optimistic. 15-30 days is common.
- No Quality Control (QC): The supplier ships whatever they want. You are blind.
- No Branding: It ships in a generic, ugly poly-mailer.
- Fulfillment Limits: Your credit card might get flagged for 50 identical $15 transactions to China in one day.
11.3 Level Up: Finding and Using a Private Agent
This is the single most important scaling step you will take. A private dropshipping agent is a person or small company in China who acts as your dedicated fulfillment team.
When to switch? As soon as you have a proven winning product with 10-20+ sales per day.
How to find an agent:
- Alibaba: Search for your product on Alibaba (the wholesale site). Message 10 suppliers—even if they have high minimums—and ask: “Hello, I am a dropshipper with 20+ daily orders for this product. I am looking for a dedicated agent for faster shipping and private fulfillment. Can you support this?”
- Upwork / Fiverr: Search for “Dropshipping Sourcing Agent.” Vet them. Ask for references and their typical shipping times/lines (e.g., “Do you use YunExpress?”).
- Referrals: Ask other non-competing dropshippers in private groups.
What an agent does for you:
- Sourcing: They will find your exact product (or a better version) for a lower price than on AliExpress.
- Fast Shipping: They have access to private shipping lines (like YunExpress) that are faster and more reliable (often 7-14 days guaranteed).
- Quality Control (QC): You pay them, they receive the goods at their warehouse, inspect them for defects, and then ship them to your customer. This step is a business-saver.
- Custom Branding: For pennies per order, they will add your logo, a custom-printed “Thank You” card, or branded packaging. This is how you build a real brand.
- Inventory Warehousing: Once you’re scaling, you can pay your agent for 500 units upfront. They hold it in their warehouse, enabling 1-day processing.
Chapter 12: Customer Service (The Profit Protector)
Your ad cost determines your revenue. Your customer service determines your profit. Bad service leads to refunds and chargebacks, which will eat your entire margin.
12.1 The 80/20 Rule: Mastering “WISMO”
80% of your customer emails will be WISMO: “Where Is My Order?”
The other 20% will be: “It’s broken,” “How do I use it?,” or “I want a refund.”
Your goal is to deflect 80% of WISMO tickets before they are ever sent.
- Honest Shipping Policy: State “8-15 business days” everywhere (product page, checkout, confirmation email).
- Branded Tracking Page: Install a free app like 17Track or a paid one like AfterShip. This adds a “Track Your Order” page to your store. Customers can self-serve, and it looks professional.
- Proactive Emails: In your email flow (Klaviyo), set up an automation: “If order fulfilled, but not delivered after 10 days, send an email: ‘Hi Jane, just a check-in! Your package is moving through the network and is on its way. You can track it here: [link].'”
12.2 The Customer Service Tech Stack
Do not try to manage support from a Gmail inbox.
- The Helpdesk (Your First Hire): Get Gorgias. It is built for Shopify. It pulls your email, live chat, and social media DMs into one dashboard.
- Why Gorgias? When you open a ticket, it automatically shows you that customer’s entire Shopify order history on the side. You can see what they bought, their tracking, and—most importantly—you can issue a refund or cancel an order from inside the helpdesk without ever opening Shopify. This is a massive timesaver.
- Macros (Canned Responses): Inside Gorgias, create Macros (templates) for your top 5 questions:
- WISMO: “Hi [Customer Name]! Thanks for reaching out. Your order is on its way! You can see its latest status here: [Tracking Link]. Please note our shipping times are 8-15 business days. Let us know if you need anything else!”
- Defective Item: “Oh no! We’re so sorry to see that. Could you please reply with a quick photo or video of the issue so we can get this resolved for you right away?”
- Refund Request (Policy): “Hi [Customer Name], per our 30-day policy, we can absolutely process a return. Please send the item to [Address] and reply with the return tracking number. Once received, we’ll issue your full refund…”
12.3 Handling Refunds and Chargebacks (The Business Killers)
- Refunds: Be liberal. If a customer gets a defective item and sends you a photo, do not make them ship it back (it’s not worth it). Instantly offer a 1) free reshipment or 2) a full refund. The goodwill is worth more than the $15 COGS.
- Chargebacks: This is the real demon. A chargeback is when a customer tells their credit card company (Visa, Amex) that your charge was fraudulent or they never received the goods.
- Why they happen: 1) Shipping took too long and they got angry. 2) They didn’t recognize your store name on their bank statement. 3) True fraud.
- How to fight: You must respond to every single one. Shopify (via Shopify Payments) gives you a simple portal to do this.
- Your Evidence: You must submit:
- Proof of delivery (the tracking number link showing “Delivered”).
- A screenshot of the shipping policy they agreed to at checkout.
- A screenshot of the “Your Order Has Shipped” email.
- How to win: Clear, honest shipping policies and a delivery confirmation are your only weapons. If you win, you get the money back. If you lose, you lose the money and a $15 chargeback fee. Too many chargebacks will get your payment processor (Stripe/Shopify Payments) shut down.
Chapter 13: Financial Mastery (Profit vs. Cash Flow)
This is the chapter that separates hobbyists from millionaires. You can be profitable and bankrupt at the same time.
13.1 Revenue is Vanity, Profit is Sanity, Cash Flow is King
- Revenue:
$49.99(What the customer paid you). - Landed Cost (True COGS):
$15(Product cost) +$3(Transaction fee, ~3%) =$18. - Gross Profit:
$49.99 - $18 = $31.99. (This is your ad budget). - Net Profit:
$31.99 - $20 (CPA from ads) = $11.99.
You made $11.99 on this sale. This is your profit. But where is the cash?
13.2 The “Dropshipping Cash Flow Gap” (Why You Need a Credit Card)
This is the single most misunderstood concept by beginners.
- Day 1: You spend $20 in real cash (from your credit card) on Facebook ads.
- Day 1: You get a sale. You must pay your supplier $15 in real cash (from your credit card) to ship the product.
- Day 1 Total Cash Out: -$35
- Day 1 Cash In: $0. (The customer’s $49.99 is in “processing” with Shopify Payments).
- Day 4: Your $49.99 payout finally hits your bank account.
You were cash-negative by $35 for 4 days.
Now, scale this. You want to spend $1,000/day on ads.
- Daily Ad Spend: $1,000
- Daily COGS (at 30%): ~$600
- Total Daily Cash Out: $1,600
- Payouts (on a 4-day delay): $0.
You need $6,400 ($1,600 x 4) in available credit or cash just to float your business for 4 days until your first payouts arrive.
This is the barrier to scaling. You must use a credit card for ads and fulfillment to manage this gap. You must reinvest 100% of your profits for months to build this cash buffer.
13.3 Legal & Tax (The “Grown-Up” Stuff)
This is not optional, and it will save you from future ruin.
- Business Structure (Sole Proprietorship vs. LLC):
- Sole Proprietorship: This is what you are by default. It’s easy, but it’s dangerous. There is no legal separation between you and the business. If your product hurts someone and they sue you, they can take your car, your house, and your personal savings.
- LLC (Limited Liability Company): This is the answer. It costs a few hundred dollars to file. It creates a legal “shield” between you and the business. If the business is sued, they can only take the business’s assets (your Shopify account, your business bank account). Your personal assets are protected.
- Action: Start as a Sole Proprietor to test your idea. The moment you are consistently profitable (e.g., $1,000+ in profit), form an LLC.
- Taxes (This is Not Advice – See an Accountant):
- Income Tax: You pay income tax on your Net Profit (
$11.99per sale), not your Revenue ($49.99). You must track your ad spend and COGS as business expenses. - Sales Tax: This is the most complex part of e-commerce. You are technically required to collect and remit sales tax in US states where you have “economic nexus” (a certain threshold of sales).
- The Simple Solution:
- Don’t worry about it for your first $10,000 in sales.
- Once profitable, sign up for Shopify Tax or an app like TaxJar. These will automatically calculate the correct sales tax for every customer at checkout.
- Hire an e-commerce accountant. They will tell you where you need to register and will file your taxes for you. This is a non-negotiable cost of doing business.
- Income Tax: You pay income tax on your Net Profit (
This final section is about the endgame. You have a product, a store, traffic, and operations. You have a profitable business. Most people stop here. They have successfully built themselves a high-paying, high-stress job.
This chapter is about how to transform that job into a true, sellable asset. It’s about building a brand that has value beyond your daily effort, creating systems to run it for you, and, finally, knowing how to cash out for a life-changing sum.
📖 Dropshipping Guide (Part 5 of 5)
The Endgame: Brand, Automation, and Your Multi-Million Dollar Exit
Welcome to the final chapter. Everything we have done—from finding a product to mastering Facebook ads—has been about building a cash-flow machine. Now, we are going to build an asset.
- A machine needs a full-time operator (you). It’s a job.
- An asset runs on systems and a team. It generates wealth for you.
This is the transition from “dropshipper” to “brand owner.” This is how you build a business that someone will pay you $500,000, $1,000,000, or more to acquire.
Chapter 14: From Dropshipper to Brand (Building Your Moat)
Right now, your only competitive advantage is your marketing (Part 3). Another dropshipper can find your same supplier, copy your website, and run ads for $1 less. This is the “race to the bottom.”
A brand is the only sustainable moat. A brand commands loyalty, trust, and higher prices. No one buys a “generic cola” if they can buy a “Coca-Cola.” We are going to turn your ZenPet.com from a store that sells dog beds into the brand for pet comfort.
14.1 The Branding “Stack”: From Generic to Unforgettable
This is a 3-step evolution.
Level 1: The “Insert Card” (The $0.05 Upgrade)
This is the cheapest, highest-ROI branding move you can make.
- What it is: A small, professionally printed card (like a business card) that your private agent (from Part 4) adds to every single package.
- What it says:
- Front: “Thank You From The [Your Brand] Family.” A personal message.
- Back: This is the call to action. DO NOT just ask for a review.
- Action 1 (Social Proof): “Love your new [Product]? Take a photo and tag us @YourBrandHandle on Instagram to be featured! 📸”
- Action 2 (Repeat Business): “As a thank you, here is 15% off your next order. Use code: VIP15″
- Why it works: It’s the first physical, branded “touchpoint” the customer has. It immediately elevates you from a faceless Chinese seller. It builds your email list and encourages a second purchase, skyrocketing your Customer Lifetime Value (LTV).
Level 2: Private Labeling (Your Logo)
This is the first step in “owning” the product.
- What it is: You work with your agent to have your logo physically printed on the product itself. (e.g., a small, tasteful tag on the ZenPet bed).
- How it works: Your agent will have a small “MOQ” (Minimum Order Quantity), often 100-200 units. You will pay for this small batch of inventory to be produced and held in your agent’s warehouse.
- The Impact: When a customer receives it, it’s your product. It’s no longer a generic “made in China” item. Competitors cannot sell the exact same item.
Level 3: Custom Packaging (The “Unboxing” Experience)
This is the final form. This is what separates $100k stores from $5M brands.
- What it is: You move from the generic yellow poly-mailer to a custom-designed, branded box or mailer bag.
- Why it works: The package is the product. A premium unboxing experience (think of Apple) justifies a premium price. It creates “User Generated Content” (UGC) because customers want to film themselves opening it.
- How it works: You will work with your agent to design the box (you can hire a designer on Fiverr for $100). This will require a larger inventory buy (e.g., 500-1,000 units), but at this stage, your sales volume supports it.
With these three steps, you are no longer a dropshipper. You are a brand. You can now charge $99.99 for the same bed competitors sell for $49.99, and your customers will happily pay it and leave you a 5-star review.
Chapter 15: Automation & Team Building (Buying Back Your Time)
Your brand is growing. You now have 50+ sales a day. You’re profitable. But you’re also working 16 hours a day. You are drowning in customer service, managing ads, talking to your agent, and checking fulfillment.
You are stuck in the “Founder’s Trap.” You have to fire yourself from every job that isn’t “CEO.”
Your goal is to only do tasks that Grow The Business.
- Growing (CEO tasks): Finding new products, setting ad strategy, building brand partnerships.
- Running (VA tasks): Answering emails, fulfilling orders, editing videos, posting on social media.
15.1 Your First Hires: The Virtual Assistant (VA) System
You will hire a small team of remote, affordable VAs. The best place to find them is on platforms like Upwork or OnlineJobs.ph (for dedicated Filipino VAs, who are amazing).
Hire 1: The Customer Service VA ($4 – $8 per hour)
- Job: To live inside your helpdesk (Gorgias, from Part 4).
- Task 1: You will train them on your 5-10 Macros (canned responses).
- Task 2: Their only job is to handle all “WISMO” tickets and basic refund requests. They will use the macros to respond politely and professionally.
- Result: This immediately frees up 10-15 hours of your week. It’s the best $150/week you will ever spend.
Hire 2: The Technical / Operations VA ($5 – $10 per hour)
- Job: To live inside DSers, Shopify, and your agent’s spreadsheet.
- Task 1: “Fulfill Orders.” They will be the ones clicking “fulfill” and managing the daily order flow.
- Task 2: “Reconciliation.” They will check that all tracking numbers are synced and that no orders were missed.
- Task 3: “Supplier Comms.” They will be the daily point of contact for your agent, asking “What is the status of order #10928?”
- Result: You are no longer in the daily “weeds” of logistics.
Hire 3: The Creative VA / Video Editor ($10 – $25 per hour)
- Job: To live inside CapCut (the video editor) and your Meta Ad Library.
- Task 1: You send them the raw product footage (from your UGC creators or suppliers).
- Task 2: They send you back 5 new video ad variations, testing different hooks, sounds, and text (as discussed in Part 3).
- Result: You now have a “creative factory” that constantly feeds your ad machine, allowing you to scale without creative burnout.
With this 3-person team (costing maybe $1,500-$2,000/month), you have just bought back 90% of your time. You are now a true CEO whose job is to sit at the top, analyze the dashboards, and direct strategy.
Chapter 16: The Exit Strategy (How to Sell Your Business for 7 Figures)
You have a profitable brand. It’s run by a team. It’s generating $20,000/month in net profit for you, and you work 10 hours a week.
You can keep this as a “cash cow” forever. Or, you can exit. You can sell this asset for a life-changing lump sum and move on to your next, bigger project.
16.1 What Makes Your Business Sellable?
A buyer is not buying your product. They are buying your system and your profit.
- Clean Financials: You must have an accountant. Your Shopify/QuickBooks must be perfect. Buyers need to see a clear, 12-24 month history of revenue, ad spend, COGS, and—most importantly—Net Profit (or SDE – Seller’s Discretionary Earnings).
- Standard Operating Procedures (SOPs): You must have a “business in a box.” This is a Google Drive folder with documents explaining exactly how to run the business (e.g., “How to handle a refund request,” “How to launch a new ad,” “How to contact the supplier”). This proves your business runs without you.
- Diversified Traffic: Is 100% of your profit from one single Facebook ad? That is extremely risky for a buyer. A highly sellable business has traffic from:
- Paid (Meta/TikTok): 40%
- Organic (SEO/Blog): 20%
- Owned (Email/SMS list): 30%
- Other (Affiliates/Partners): 10%
- A “Moat” (Your Brand): Is it a generic dropshipping store (low value) or a branded, private-label business with custom packaging and a registered trademark (high value)? This is where your work from Chapter 14 pays off.
- A Team: Having your VAs in place is a massive selling point. The buyer knows they aren’t just buying a job.
16.2 The Valuation: How Much Is Your Business Worth?
Here is the simple formula professional brokers use.
Value = SDE (Seller’s Discretionary Earnings) x Multiple
- SDE: This is your annual net profit plus your own salary and any personal add-backs (like a car payment you run through the biz). For simplicity, let’s just call it Annual Net Profit.
- Multiple: This is the “score” of how good your business is. It ranges from 2x to 5x (or 24x-60x your monthly net profit).
Scenario 1: “The Risky Dropshipper”
- Net Profit: $10,000/month ($120,000/year)
- Business: Generic products, 95% of traffic from one Facebook ad, no team.
- Multiple: 2.0x – 2.5x
- Valuation: $120,000 * 2.5 = $300,000
Scenario 2: “The Defensible Brand”
- Net Profit: $10,000/month ($120,000/year)
- Business: Custom private-label products, custom packaging, trademarked logo, 40% traffic from email/SEO, 3-person VA team in place.
- Multiple: 4.0x – 5.0x
- Valuation: $120,000 * 4.5 = $540,000
By building a brand (Chapter 14) and a team (Chapter 15), you have made your business $240,000 more valuable on the same amount of profit.
16.3 Where to Sell Your Business
- $5k – $100k (Small Stores): Shopify’s Exchange Marketplace. This is a good place for quick, small “flips.”
- $100k – $5M (Real Businesses): Empire Flippers or FE International. These are the world’s top brokers for online businesses. They will take a % fee, but they will professionally package your business and bring you a network of high-net-worth buyers, ensuring you get the highest possible multiple.
Conclusion: Your Journey is Complete
This guide has taken you on the entire entrepreneurial journey.
- Part 1: You learned to find a “painkiller” product in a growing niche.
- Part 2: You built a professional, high-conversion “sales machine” on Shopify.
- Part 3: You mastered the art and science of paid traffic, learning to buy customers profitably.
- Part 4: You became a true operator, managing logistics, customers, and the cash flow that fuels your growth.
- Part 5: You transformed from a dropshipper into a brand owner, building an automated, sellable asset.
Dropshipping is not a get-rich-quick scheme. It is a real business model that requires real skill. It is a “bootcamp” for e-commerce that teaches you more about marketing, finance, and logistics in six months than a 4-year business degree.
The path is laid out. The systems are proven. The work is hard, but the blueprint is in your hands.
The only thing left to do is start.