
If you’re reading this, you’re already one of two kinds of bloggers:
- The ambitious newcomer, overwhelmed by the endless monthly subscriptions pitched by every guru online.
- The seasoned veteran, tired of juggling five expensive tools when your primary goal is simply to write, rank, and grow.
Welcome to the definitive guide that cuts through the noise. This is not another fleeting listicle; this is the ultimate blueprint revealing that the highest-impact tools in the entire professional blogging industry are the ones that cost precisely zero dollars.
For too long, the secret to success has been wrapped up in expensive monthly fees. That narrative ends here.
The $0 Path to $100K: Why You Don’t Need Premium Plans
The difference between a successful blog and an abandoned project is not a $299 annual fee for a “Pro” feature; it is a strategic workflow built on fundamental digital principles. The platforms that own the internet—Google, Facebook, and the top-tier software companies—all provide astonishingly powerful free tiers because they benefit from your activity.
This comprehensive guide transforms you from a budget-constrained hobbyist into a lean, optimized publishing powerhouse.
What This Guide Promises (The 5 Pillars of Free Success)
Over the next, we will tear down your blogging process and rebuild it using a powerful, cohesive stack of over 30 genuinely free tools, categorized into five essential pillars:
| Pillar | Core Challenge Solved | The Strategic Outcome |
| I. Content Foundation | Overcoming writer’s block and editing flaws. | Generate high-quality drafts and maintain authoritative clarity. |
| II. The Traffic Engine (SEO) | Finding keywords and diagnosing technical issues. | Unlock organic traffic using Google’s own free data. |
| III. The Visual Storyteller | Creating professional images without slowing your site. | Build a strong, fast brand identity that wins the Core Web Vitals test. |
| IV. The Audience Builder | Converting anonymous visitors into recurring income. | Grow an owned email list (your most valuable asset) for free. |
| V. The Productivity Powerhouse | Managing massive projects and eliminating distractions. | Establish an unbreakable content workflow that hits every deadline. |
By the time you reach the conclusion, you will have a ready-to-implement software stack that not only rivals the paid solutions but often surpasses them in strategic value for the bootstrapped creator.
Stop scrolling, start building. Your new, free, professional blogging workflow begins right now.
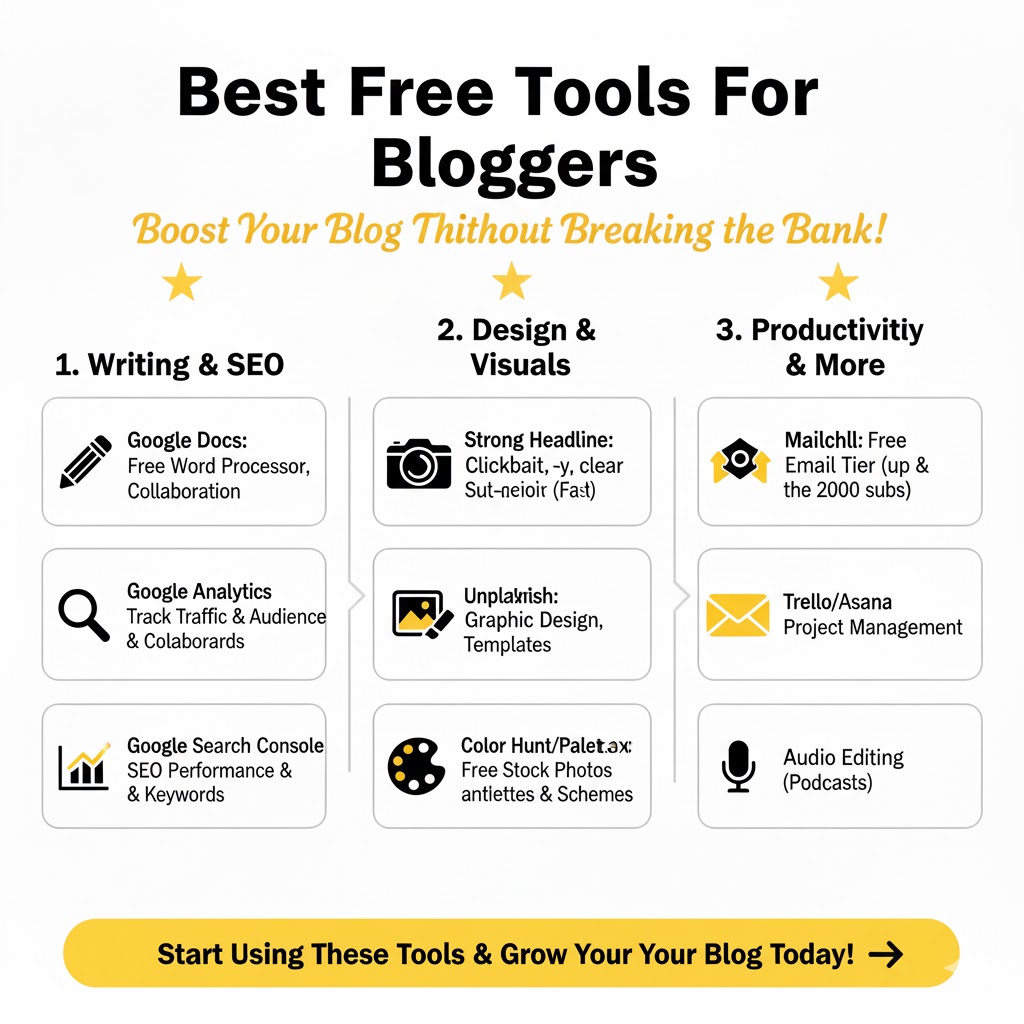
✍️ The Best Free Tools for Bloggers
Part 1: The Foundation of Content (Writing & Editing Tools)
(The in-depth content for this section is provided immediately below the outline.)
- 1.1. AI Writing & Idea Generation (Leveraging Free AI to Beat Writer’s Block)
- Tool 1: ChatGPT / Gemini (The Versatile Idea Machine): Focus on outlines, headline variations, topic clusters, and overcoming the blank page.
- Tool 2: QuillBot (The Paraphrasing Powerhouse): Focus on rewriting long sentences for clarity, checking grammar, and the summarizer feature for research.
- Tool 3: GrammarlyGO / Simplified AI (The Polisher): Focus on the free tier’s ability to quickly generate email subject lines or short snippets.
- 1.2. Grammar, Clarity, and Style (Polishing the Prose for Authority)
- Tool 4: Grammarly (The Essential Editor): Deep dive into the free features: spelling, grammar, and tone detection. Crucial for professional trust.
- Tool 5: Hemingway App (The Clarity Crusher): Focus on simplifying complex prose, identifying passive voice, and reducing reading time.
- Tool 6: ProWritingAid (The Style Analyst – Free Version): Highlighting the free online report that analyzes style, grammar, and redundant wording.
Part 2: The Traffic Engine (SEO & Keyword Research Tools)
- 2.1. Foundational Keyword Research (Finding the Low-Competition Gems)
- Tool 7: Google Keyword Planner (The Intent Finder): Explain how to use it for organic ideas, not just paid ads. Focus on volume bands.
- Tool 8: Google Trends (The Topic Validator): Focus on seasonal trends, comparing search terms, and validating long-term topic viability.
- Tool 9: AnswerThePublic (The Question Generator): Deep dive into PAA (People Also Ask) content generation and capturing long-tail keywords.
- Tool 10: Ubersuggest / KWFinder (The Limited-Access Powerhouses): Highlighting the daily free search limits and how to maximize them.
- 2.2. On-Page SEO and Technical Health (Getting Your Article to Rank)
- Tool 11: Google Search Console (The Free SEO Report Card): Focus on Impression, Clicks, Click-Through-Rate (CTR), and fixing Coverage/Core Web Vitals issues.
- Tool 12: Google Analytics 4 (GA4) (The Audience Tracker): Focus on free reports like traffic sources, user engagement, and popular pages.
- Tool 13: Yoast SEO / Rank Math (The WordPress Plugin Essentials – Free Tier): Focus on the free on-page analysis, readability score, and XML sitemap creation.
Part 3: The Visual Storyteller (Design & Image Tools)
- 3.1. Graphic Design and Branding (Creating Thumb-Stopping Visuals)
- Tool 14: Canva (The Drag-and-Drop King): Extensive coverage of its free templates, one-click resizing for social media, and creating professional blog post feature images.
- Tool 15: Adobe Express (The Quick Creator): Focus on its free background remover feature and a library of royalty-free Adobe Stock assets.
- 3.2. Image Optimization and Stock Photos (Speed and Licensing)
- Tool 16: Pixlr E/X (The Browser-Based Photoshop): Detail the differences: Pixlr E for advanced edits (layers) and Pixlr X for quick, simple fixes.
- Tool 17: TinyPNG / Squoosh (The Speed Optimizer): Explain the importance of image compression for site speed and how these tools drastically reduce file size without losing quality.
- Tool 18: Unsplash / Pexels / Pixabay (The Free Stock Trifecta): Emphasize the Creative Commons Zero (CC0) license for commercial use and avoiding copyright infringement.
Part 4: The Audience Builder (Email Marketing & Lead Generation Tools)
- 4.1. Email Service Providers (The Direct Line to Your Audience)
- Tool 19: MailerLite (The User-Friendly Choice): Highlighting its generous free tier (usually up to 1,000 subscribers) with landing pages and basic automation.
- Tool 20: Sender / EmailOctopus (The High-Volume Senders): Focus on the free tiers’ higher monthly email allowances for new bloggers.
- Tool 21: Beehiiv / Substack (The Creator-Focused Platforms): Focus on their integrated website/newsletter model, perfect for content creators focusing on monetization.
- 4.2. Lead Capture and Pop-ups (Converting Visitors to Subscribers)
- Tool 22: Mailchimp / HubSpot Free CRM (The Integration Specialists): Focus on their free form and landing page builders that seamlessly integrate with your blog.
Part 5: The Productivity Powerhouse (Organization & Workflow Tools)
- 5.1. Content Planning and Organization (Managing a Multi-Post Strategy)
- Tool 23: Trello / Asana (The Visual Calendar): Detail how to set up a free Content Calendar board (Ideas > Draft > Edit > SEO Check > Published).
- Tool 24: Google Docs / Notion (The Collaborative Workspace): Focus on version history, sharing permissions, and the clean, distraction-free writing interface.
- 5.2. Time Management and Focus (Protecting Your Writing Flow)
- Tool 25: RescueTime (The Time Tracker): Explain how the free version helps identify where your time is actually spent vs. where you think you’re spending it.
- Tool 26: Forest / Freedom (The Focus Enforcers – Free/Trial): Mentioning tools that block distracting websites during designated writing sprints.
Detailed Content for Part 1 (Writing & Editing Tools)
Part 1: The Foundation of Content (Writing & Editing Tools)
The lifeblood of any successful blog is its content. As a blogger aiming for long-form, 10,000+ word articles, your writing process needs to be efficient, insightful, and absolutely error-free. You need tools that not only correct grammar but also aid in the grueling tasks of outlining, rewriting, and simplifying complex concepts. These free tools are the non-negotiable bedrock of your professional writing career.
1.1. AI Writing & Idea Generation: Leveraging Free AI to Beat Writer’s Block
The secret to a 10,000-word article is not writing one massive chunk; it’s efficiently linking dozens of high-quality sections. AI tools, even on their free tiers, are the perfect assistants for the heavy-lifting of outlining and ideation, saving you hours of pre-writing frustration.
Tool 1: ChatGPT / Gemini – The Versatile Idea Machine
For the long-form blogger, the free version of top-tier AI models is a game-changer, acting as a tireless research assistant, brainstorming partner, and outline generator.
| Feature to Master (Free Tier) | Blogger Application for 10,000-Word Content | SEO Value |
| Comprehensive Outlining | Generate a detailed, multi-level (H2, H3, H4) structure for your colossal article. A 10,000-word piece needs 15-20 H2s; the AI can draft this in minutes. | Ensures topical authority by covering all necessary subtopics (content breadth). |
| Topic Cluster Identification | Give it your main keyword and ask for 20 related sub-topics that deserve their own blog posts. | Helps create a pillar page strategy, a cornerstone of advanced SEO. |
| Headline & Hook Variations | Provide your core idea and ask for 50 different title options (Listicle, How-To, Question, Negative, etc.) and 10 different opening paragraphs. | Boosts your Click-Through Rate (CTR) on the SERP (Search Engine Results Page). |
| Simple Explanations | Paste a complex paragraph of research and ask the AI to “Explain this simply to a beginner.” | Crucial for maintaining a high readability score and accommodating a wide audience. |
Actionable Tip: Use the free AI to create the detailed H2/H3/H4 outline first. This acts as your mandatory table of contents, ensuring you cover everything and provides the structure you need to easily measure your progress toward the 10,000-word mark.
Tool 2: QuillBot – The Paraphrasing Powerhouse
QuillBot’s free tier excels at three things essential for a high-volume writer: rephrasing for flow, checking grammar, and summarizing research.
- Rephrasing for Flow: In a long article, you will inevitably repeat concepts. Use QuillBot’s Paraphraser to quickly generate an alternative way to phrase a sentence or paragraph, ensuring your prose remains engaging and non-repetitive.
- Summarizer Feature: When you’re consuming massive amounts of research to support your long-form article, paste in a source (or upload a document) and let QuillBot distill the core arguments. This dramatically cuts down on reading time and helps you extract only the key supporting points.
- Grammar Checker: A solid, no-frills grammar checker that acts as an excellent second pass after your primary editing tool.
Tool 3: GrammarlyGO / Simplified AI – The Quick-Draft Specialist
While not a full-scale long-form writer on the free plan, these tools are invaluable for short-form tasks that support your main article:
- Email Subject Lines: Use the free AI to generate compelling subject lines for the email you’ll send to promote your 10,000-word article.
- Social Media Snippets: Ask it to create 5 distinct social media posts (for X, LinkedIn, etc.) to promote a section of your massive article.
- Meta Descriptions: Provide the AI with your finalized H1 title and ask it to craft 3 unique, SEO-friendly meta descriptions under the 160-character limit.
1.2. Grammar, Clarity, and Style: Polishing the Prose for Authority
Grammar and clarity are non-negotiable for a professional blog. Readers associate errors with a lack of authority. For a 10,000-word article, one tiny error can be magnified. These free tools are the virtual copyeditors that ensure your massive article reads like a masterpiece.
Tool 4: Grammarly – The Essential Editor
The free version of Grammarly is one of the most powerful tools in a blogger’s arsenal. It moves beyond simple spelling mistakes to enforce professionalism.
| Free Feature | Significance for Long-Form Content |
| Core Grammar & Spelling | Catches the non-obvious errors (like confusing “their” and “there”) that a basic word processor misses. |
| Conciseness Suggestions | Flags wordy phrases (“due to the fact that” can become “because”) that bloat your word count without adding value. |
| Punctuation Check | Essential for ensuring professional use of commas, semicolons, and apostrophes across thousands of words. |
| Tone Detection (Post-Draft) | Analyzes your text to tell you if your writing sounds confident, friendly, formal, or angry. Crucial for aligning your content with your brand voice. |
Pro Tip for Bloggers: Always use Grammarly after you’ve written your draft. Constantly fixing grammar while drafting breaks your flow and creativity. Write first, edit second.
Tool 5: Hemingway App – The Clarity Crusher
The Hemingway App is not a grammar checker; it is a style and clarity checker. For a long-form article, it is the best tool for combating the single biggest threat to reader engagement: Complexity.
- The Readability Score: Hemingway tells you the grade level your content is written for. The goal for most professional blogs is a Grade 7 or 8. If your 10,000-word article reads at a Grade 12 level, you will lose a huge percentage of your audience.
- Passive Voice: The tool highlights all instances of passive voice. Fixing passive voice instantly makes your writing more direct, authoritative, and engaging.
- Adverbs and Weakening Words: It highlights adverbs (e.g., very, really) and phrases that weaken your arguments, encouraging you to use stronger, more descriptive nouns and verbs instead.
Tool 6: ProWritingAid – The Style Analyst (Free Version)
While its paid version is robust, the free online analysis report from ProWritingAid provides deep insights into your writing habits that other tools don’t touch.
- The Report Focus: Use the free report to check for style-specific issues like over-reliance on a single word, cliches, or corporate jargon. This is incredibly useful for ensuring your long article doesn’t feel like it was written by a machine.
- Contextual Thesaurus: The free browser extension provides a contextual thesaurus that suggests better alternatives for words, helping you elevate your vocabulary and prevent monotony over the vast length of your article.
Excellent! Moving directly into the crucial next phase of any successful blog: SEO and Traffic Generation.
🚀 Part 2: The Traffic Engine (SEO & Keyword Research Tools)
The finest piece of writing is useless if no one can find it. Search Engine Optimization (SEO) is the mechanism that connects your valuable 10,000-word article to the millions of people searching for its topic. Fortunately, the most powerful and insightful SEO tools are completely free, provided directly by Google.
For a long-form blogger, SEO isn’t just about finding a keyword; it’s about building topical authority—proving to Google that your site is the single best resource on an entire subject cluster. The free tools below are your arsenal for achieving this.
2.1. Foundational Keyword Research: Finding the Low-Competition Gems
Before you write a single word, you must know what words your target audience is typing into the search bar. Free keyword tools are your window into the mind of the searcher.
Tool 7: Google Keyword Planner – The Intent Finder
While originally designed for Google Ads, the Keyword Planner remains a powerhouse for organic SEO when used correctly. Its primary strength lies in identifying user intent and providing solid, if slightly broad, data directly from the source.
| Feature to Master (Free Tier) | Blogger Application for Organic SEO | Topical Authority Strategy |
| “Discover New Keywords” | Enter your broad topic (e.g., “free blogging tools”) and let the Planner generate hundreds of related long-tail terms (e.g., “best free image editor for bloggers”). | Use the sheer number of ideas to build your sub-topic clusters. Each related term could be a different H3 or H4 in your long-form post. |
| Broad Volume Ranges | Instead of exact search volume, it shows volume in bands (e.g., 1K–10K/month). Target keywords in the 100–1K or 1K–10K bands for the best balance of traffic potential and lower competition. | Prioritizing lower-volume, highly specific keywords is the key to getting initial traffic before tackling highly competitive terms. |
| Competition Metric | The “Competition” column refers to Paid competition, but it often serves as a proxy for organic difficulty. A “Low” competition term often means fewer advertisers, suggesting it might also be easier to rank for organically. | Focus on the long-tail queries that show a ‘Low’ competition score to quickly gain traction and link authority. |
Strategic Use: The key is to use the tool to find the informational intent keywords—the “how-to,” “what is,” and “best free” queries—that are perfect for a long, comprehensive blog post.
Tool 8: Google Trends – The Topic Validator
A successful blogger writes about topics people care about right now and topics that will matter in the future. Google Trends helps you validate your ideas against real-world search behavior.
- Spotting Evergreen vs. Trending: Use the tool to check if your topic is evergreen (a flat, consistent line over 5 years) or trending (a spike). Long-form articles should always target evergreen topics that will provide traffic for years, while trending topics can be used for smaller, topical posts that link back to your main pillar.
- Comparing Search Terms: If you are torn between two related keywords (e.g., “free SEO tools” vs. “no-cost keyword research”), compare them side-by-side. This reveals which term is currently more popular in your target region and helps you choose the most impactful main keyword.
- Geographical Interest: See where in the world your topic is most popular. This is essential if your blog targets a specific country or region, allowing you to tailor your content and language accordingly.
Tool 9: AnswerThePublic – The Question Generator (PAA Gold Mine)
Google’s “People Also Ask” (PAA) boxes are a major source of rich, snippet-based traffic. AnswerThePublic’s free tool is specifically designed to extract hundreds of questions, prepositions, and comparisons related to your main keyword.
- The Content Gap Filler: Type in your main keyword. The tool provides visualizations of questions like Who, What, When, Where, Why, and How. Every single one of these questions should be integrated into your 10,000-word article as an H3 or H4 subheading followed by a clear, concise answer.
- Capturing Featured Snippets: When you answer a direct question (e.g., “How do bloggers make money?”) clearly and concisely at the top of an H3 section, you increase your chances of securing the coveted Featured Snippet, instantly boosting your visibility.
- Prepositional Phrases: Phrases like “blogging without money,” “tools for designers,” or “editing near me” provide valuable, highly-specific long-tail keywords that attract ultra-targeted traffic.
Tool 10: Ubersuggest / KWFinder – The Limited-Access Powerhouses
While these are premium tools, their free tiers offer just enough daily data to be invaluable for strategic, disciplined keyword research.
- Ubersuggest (The SEO Overview): The free Chrome extension shows you estimated traffic and Domain Authority (DA) directly on the Google search results page. This is critical for competitive analysis: If all the top 10 results have a DA of 70+, you know that keyword is too competitive. If you see DAs under 30, it’s a good target. The daily limit allows you to vet 3–5 core topic ideas per day.
- KWFinder (The Difficulty Checker): KWFinder is celebrated for its highly accurate Keyword Difficulty (KD) score. The free daily lookups (usually around 5 per day) should be reserved for checking the KD score of your final long-tail keyword selections. Target any keyword with a KD score under 20.
2.2. On-Page SEO and Technical Health: Getting Your Article to Rank
Keywords get you into the game, but Google’s proprietary tools are what tell you how to win it. These tools are non-negotiable for monitoring your site’s interaction with Google’s index.
Tool 11: Google Search Console (GSC) – The Free SEO Report Card
This is the most critical free tool provided by Google. It’s your site’s health monitor, performance tracker, and direct line of communication with the world’s largest search engine.
| GSC Free Report | SEO Action for Long-Form Content | Impact on 10,000-Word Article |
| Performance Report | Filter by Queries and find keywords you rank for on Page 2 (position 11-20). | Low-Hanging Fruit: Add a dedicated H3 section to your 10,000-word article to better target these Page 2 keywords. This is the fastest way to jump to Page 1 traffic. |
| Core Web Vitals | Identify slow-loading pages (especially important if your long post is image-heavy). | User Experience (UX) Signal: Fixing issues like high Largest Contentful Paint (LCP) ensures your 10,000-word post doesn’t get penalized for slow loading on mobile devices. |
| Index Coverage | Check the status of your submitted Sitemap and ensure your new article is indexed. Use the URL Inspection Tool to request immediate indexing of your mammoth post. | Speed to Market: Get your massive content piece indexed and ranking in hours, not days or weeks. |
| Links Report | Analyze which of your other pages are linking to your new article (Internal Links). | Authority Transfer: A successful 10,000-word pillar post must have dozens of links from your smaller, related blog posts to signal its importance to Google. |
Tool 12: Google Analytics 4 (GA4) – The Audience Tracker
GA4 (formerly Universal Analytics) tells you what happens after the user clicks. It measures engagement, which is now a primary ranking factor.
- Engagement Rate: Track the engagement rate for your 10,000-word post. A high rate tells Google that users are finding the content valuable and sticky. If the rate is low, it means the content is too dense, and you may need to break it up with more visuals or shorter paragraphs.
- Traffic Sources: See where your readers are coming from (Organic Search, Social Media, Direct, Email). This insight allows you to double down on the channels that work best for your unique long-form content.
- Top Pages Report: Use this to identify the smaller, high-performing articles that are generating initial traffic. These articles should have strong, clear internal links pointing to your comprehensive, 10,000-word pillar content.
Tool 13: Yoast SEO / Rank Math – The WordPress Plugin Essentials (Free Tier)
If your blog is built on WordPress, these plugins are the final, essential check before publishing. Their free tiers are more than enough for excellent on-page optimization.
- On-Page Analysis: Provides real-time feedback on whether you’ve used your focus keyword in the title, URL, first paragraph, and alt text. This is a crucial automated check.
- Readability Score: Ranks your content based on the Flesch-Kincaid scale (tying directly back to the Hemingway App). It ensures that even though your article is long, it is easy to read.
- XML Sitemap Creation: The plugins automatically generate and update the XML sitemap, which you then submit to Google Search Console, ensuring Google knows about every single page on your site.
🎨 Part 3: The Visual Storyteller (Design & Image Tools)
In a world saturated with text, images are no longer optional—they are an SEO necessity. A visually engaging article is more likely to be shared, bookmarked, and fully consumed, all of which send positive signals to search engines. Moreover, every image you create needs to be precisely sized, properly credited, and ruthlessly optimized for site speed.
This section reveals the best free tools for bloggers to go from zero design skills to publishing professional-grade visual content that won’t slow down your 10,000-word masterpiece.
3.1. Graphic Design and Branding: Creating Thumb-Stopping Visuals
Your brand’s identity is often established in the first few seconds a reader sees your featured image or a social media graphic. These free tools provide the templates and flexibility needed to maintain a high-quality, consistent brand look.
Tool 14: Canva – The Drag-and-Drop King
Canva is the undisputed champion of free graphic design for bloggers. Its free tier is so generous that many professional bloggers never need to upgrade. It’s the single best tool for consistency, especially when dealing with a massive content project like a 10,000-word article that requires dozens of unique visuals.
| Feature to Master (Free Tier) | Blogger Application for Visual Consistency | SEO and UX Value |
| Thousands of Free Templates | Find a template for a blog post header, Pinterest pin, or Instagram carousel. Customize the colors, fonts, and logo once, and save it as your template. | Templates ensure visual consistency across all 10,000 words, reinforcing brand recognition and authority. |
| Content Creation Hub | Easily create charts, graphs, and simple data visualizations to embed within the long article. This breaks up text walls and makes complex data digestible. | Visualizing data improves user engagement and the time spent on page, both vital ranking signals. |
| Free Stock Photo & Element Library | Access millions of free photos, icons, shapes, and illustrations directly within the editor. This cuts down on the time spent searching external stock sites. | Simplifies the creation process and ensures all elements are licensed for commercial use (always double-check specific usage rights). |
| Resizing Limitations (Workaround) | While resizing isn’t free, you can use the free “Custom Size” button to start a new design at the precise dimensions needed (e.g., a perfect 1200×675 blog header). | Ensures images are never unnecessarily large, contributing directly to faster page load times. |
Workflow Hack: Create a single “Brand Kit” document in Canva with your primary and secondary color hex codes and font pairings. Always refer to this document for every graphic you create for your massive article to maintain perfect visual harmony.
Tool 15: Adobe Express – The Quick Creator
Adobe Express (formerly Adobe Spark) is Adobe’s response to Canva, and its free features are surprisingly potent, particularly for bloggers who value high-end photo manipulation tools.
- Free Background Remover: This is a killer free feature. You can upload an image (like a product or a person) and instantly remove the background with a single click. This is essential for creating clean, professional-looking product showcases or branded quote graphics for social promotion.
- Access to Basic Adobe Stock: The free version grants access to a limited but high-quality collection of royalty-free Adobe Stock photos, vectors, and design assets, giving your blog a more premium feel compared to generic free stock.
- Text Effects and Animation: Use the free text tools to create eye-catching, headline-style text that truly pops, ideal for making the internal jump links and call-to-action (CTA) graphics within your 10,000-word content stand out.
3.2. Image Optimization and Stock Photos: Speed and Licensing
A single unoptimized image can negate all your SEO efforts. The goal for a long article (which will have many images) is to make those files as small as possible without visible quality loss. This is known as lossy compression.
Tool 16: Pixlr E/X – The Browser-Based Photo Editor
Pixlr offers two excellent, completely free, browser-based editors that bridge the gap between simple design and complex photo manipulation.
| Pixlr Version | Best for the Long-Form Blogger | Technical Use Case |
| Pixlr E (Advanced) | Precision editing. It feels like a simplified Photoshop. It supports layers, has advanced adjustment tools (levels, curves), and gives you granular control over colors. | Ideal for detailed work like correcting research chart colors, masking specific areas, or combining multiple complex visual elements. |
| Pixlr X (Express) | Quick, simple edits. Focused on one-click adjustments, cropping, resizing, and adding text or effects quickly. It’s fast and user-friendly. | Use it for rapid tasks: cropping a screenshot, quickly adjusting brightness/contrast, or converting an image to a different file format (JPEG, PNG). |
Tool 17: TinyPNG / Squoosh – The Speed Optimizer
These tools are not glamorous, but they are arguably the most essential for a 10,000-word article, which depends on fast loading times to keep readers engaged and to satisfy Google’s Core Web Vitals (see Part 2).
- TinyPNG (and TinyJPG): This service uses smart lossy compression techniques to drastically reduce the file size of your images (PNG and JPEG) without a noticeable drop in visual quality. Always run your final design through TinyPNG before uploading it to your blog.
- Squoosh (Google’s Compression Tool): This is a free, powerful tool from Google that allows you to see the side-by-side impact of different compression formats and settings. You can compare the quality loss against the size reduction to find the perfect balance. It supports next-gen formats like WebP, which is significantly smaller than traditional JPEG and is now standard for faster web loading.
Absolute Rule for Bloggers: Never upload an image directly from your camera, phone, or design software. An unoptimized image can easily be 5 MB. A properly optimized image for the web should be under 200 KB—ideally under 100 KB.
Tool 18: Unsplash / Pexels / Pixabay – The Free Stock Trifecta
Copyright infringement is a costly mistake. Stick to resources that offer the Creative Commons Zero (CC0) license, which means the images are free for personal and commercial use without attribution (though attribution is always a nice gesture).
- Unsplash: Known for high-quality, professional photography, often with a slightly moody or artistic aesthetic. Excellent for hero images.
- Pexels: Offers both high-quality photos and short stock video clips. Using a video clip as an engaging header on your long post can be a huge engagement booster.
- Pixabay: Features a vast collection of photos, vectors, and illustrations. Good for finding simple, conceptual graphics that fit niche topics.
By integrating these three types of free tools, you build a visual strategy that is professional, legally safe, and optimized for peak SEO performance.
💌 Part 4: The Audience Builder (Email Marketing & Lead Generation Tools)
SEO drives traffic, but email marketing builds your business. Relying solely on Google is like building your house on rented land—algorithms can change overnight, but your email list remains yours forever. For the ambitious long-form blogger, an email list is the ultimate monetization tool, allowing you to launch products, promote affiliate links, and drive consistent traffic back to your content.
The free tools in this category focus on two things: Generous subscriber limits and the ability to set up basic automation sequences to nurture new leads.
4.1. Email Service Providers (ESPs): The Direct Line to Your Audience
The true power of an ESP isn’t just sending emails; it’s the ability to segment your audience and automate follow-up sequences. Look for free tiers that offer high deliverability and functional automation.
Tool 19: MailerLite – The User-Friendly Choice
MailerLite is a favorite among bloggers for its simplicity, clean interface, and functional free tier. It provides the essential tools for a new blogger to start capturing and communicating with their audience professionally.
| MailerLite Free Feature | Blogger Application for Audience Growth | Monetization Potential |
| Generous Subscriber Limit | Typically offers up to 500 subscribers (with unlimited monthly sends). This is a perfect starting threshold to validate your niche and email content. | Allows you to start building revenue through a small, hyper-engaged list before incurring any costs. |
| Landing Page Builder (Limited) | You get access to a free, simple Landing Page builder. Use this to create a single, high-converting page advertising your main lead magnet (e.g., a “10-Page Checklist for [Your Topic]”). | The dedicated landing page removes website distractions, increasing your conversion rate of visitors to subscribers. |
| Automation Workflow (Basic) | Allows for one or two simple Automation Workflows. The essential “Welcome Sequence” (e.g., Email 1: The Thank You; Email 2: Your Best Content; Email 3: The Offer). | Nurturing leads on autopilot. A well-written welcome sequence can automatically turn new subscribers into loyal fans and, eventually, paying customers. |
| Segmentation | Enables basic tagging and segmentation. You can tag subscribers who signed up for one type of content versus another. | Essential for sending targeted, non-spammy promotions. You only send the affiliate product email about SEO to the segment interested in SEO. |
Best for Long-Form Content: Use MailerLite’s forms to offer a “PDF Cheat Sheet” summary of your 10,000-word article. This high-value incentive will drastically increase opt-in rates.
Tool 20: Sender / EmailOctopus – The High-Volume Senders
If your blog niche requires higher email volume or a larger initial subscriber count, these platforms often offer more generous numbers on their free tiers, though sometimes with fewer advanced features than MailerLite.
- Sender: Known for its highly generous free plan, which often includes up to 2,500 subscribers and a high monthly email send volume. This is ideal for bloggers who are generating a lot of initial traffic and want a rapid list build.
- EmailOctopus: Offers a simple interface and a solid free tier (often around 2,500 subscribers and 10,000 emails/month). It focuses on deliverability and ease of use, making it a reliable option for newsletters.
Tool 21: Beehiiv / Substack – The Creator-Focused Platforms
These platforms are distinct because they merge your email list with your website hosting. They are fundamentally designed for content creators who prioritize the newsletter as the core of their business model.
- Integrated Model: Your newsletter is your blog. They provide a simple, clean, mobile-optimized online space for your long-form content and integrate the subscription form seamlessly.
- Monetization First: They have built-in tools for paid subscriptions from day one. If your primary goal is to monetize loyal readers through a premium newsletter (e.g., exclusive content from your 10,000-word guide), these are the fastest routes to market.
- Focus on Deliverability: Since their reputation relies entirely on email, they usually invest heavily in email deliverability, ensuring your content avoids the dreaded spam folder.
4.2. Lead Capture and Pop-ups: Converting Visitors to Subscribers
Capturing leads is not just about having a form; it’s about strategically placing forms at the moment of highest reader engagement. For a 10,000-word article, the two best places for a sign-up form are the beginning (the “bait”) and the end (the “closer”).
Tool 22: Mailchimp / HubSpot Free CRM – The Integration Specialists
While Mailchimp has reduced its free subscriber limits over the years, its strength, along with HubSpot, remains in its integration power and versatile form building.
- Mailchimp’s Embedded Forms: The free plan allows you to create simple, embeddable sign-up forms that you can easily place directly into your WordPress sidebar or at the end of your blog posts.
- HubSpot Free CRM & Forms: HubSpot’s free tools are exceptional because they combine the lead capture form with a powerful, basic Customer Relationship Management (CRM) system.
- Application: When someone signs up via a HubSpot form, they are instantly added to your CRM, allowing you to track their activity (e.g., “This user downloaded the checklist and visited the 10,000-word article four times”).
- Lead Scoring: This allows you to manually score and prioritize your best, most engaged leads for future outreach or specialized offers.
Tool 23: Canva’s Free Website Builder – The Ultimate Landing Page Cheat
As mentioned in Part 3, Canva is not just for graphics; it offers a simple, free Website/Landing Page builder.
- Zero-Cost Page: If your main ESP (like Mailchimp) has restrictive limits on free landing pages, you can design a beautiful, conversion-focused landing page entirely in Canva and publish it to a free Canva subdomain.
- Purpose: This page can be your dedicated “Lead Magnet Funnel” page. It hosts a visually stunning, distraction-free offer that collects emails and then redirects users to your ESP for the actual email delivery. This maximizes the conversion rate for your $0 budget.
Tool 24: Sumo (or comparable free plugins) – The Pop-up & Scroll Box Enforcers
Aggressive pop-ups can hurt UX, but strategically timed ones are essential for maximizing conversions on high-traffic content. Sumo’s free tier (or similar lead magnet WordPress plugins like Elementor’s basic pop-up feature) is the solution.
- Exit-Intent Pop-up: Use the free tool to trigger a final opt-in form when a reader’s mouse movements indicate they are about to leave the page. This is your last chance to capture the reader who just finished a section of your 10,000-word article.
- Scroll Box: Set a small, non-intrusive box to appear after the reader scrolls 50% of the way through your massive article. The fact that they scrolled so far proves they are highly engaged, making them a prime candidate for subscribing.
🧠 Part 5: The Productivity Powerhouse (Organization & Workflow Tools)
Writing a 10,000-word article is not a creative sprint; it is a marathon of strategic execution. The difference between a blogger who publishes once a year and one who publishes weekly is rarely talent—it is almost always workflow, organization, and focus.
These final, crucial tools keep your content machine running smoothly. They are free project management and focus apps that ensure you hit deadlines, conquer procrastination, and keep your mammoth content project on track.
5.1. Content Planning and Organization: Managing a Multi-Post Strategy
The sheer volume of ideas, research, and drafts required for a comprehensive pillar article and its surrounding content cluster demands a central, organized hub. Forget spreadsheets; visual organization is the most effective.
Tool 25: Trello / Asana – The Visual Content Calendar
Trello and Asana utilize the Kanban board system (boards, lists, and cards) which is perfectly suited for managing the flow of a content production pipeline. The free tiers are powerful enough for solo bloggers or small teams.
| Trello/Asana Free Feature | Blogger Application for Long-Form Content | Productivity Gain |
| Kanban Workflow Board | Create a board with lists representing your content stages: Ideas > Research > Draft (10k word post) > Editing (Part 1, Part 2, etc.) > Visuals In Progress > SEO Optimization > Scheduled > Published. | Provides an instant visual status of your entire content project. You can immediately see bottlenecks (e.g., too many items stuck in the ‘Editing’ column). |
| Cards for Content Units | Each Card represents a section of your 10,000-word article (e.g., “Drafting H2: Free Email Tools”). Attach all relevant research links, Canva graphics, and SEO keywords directly to the card. | Centralizes all assets for a specific task. Eliminates wasted time searching multiple folders and applications for supporting documents. |
| Calendar View (Power-Up) | Use the free Calendar view to assign Due Dates to each card. This transforms your workflow board into a functional editorial calendar. | Essential for meeting the rigid deadlines required to tackle a 10,000-word article in manageable chunks (e.g., “H2 part 1 due every Monday”). |
Tool 26: Google Docs / Notion – The Collaborative Workspace
While you may write in a distraction-free app (see below), Google Docs and Notion are indispensable for collaboration, organization, and version control.
- Google Docs (Collaboration & History): If you hire a freelance editor or need feedback from a colleague, Docs provides real-time collaboration, commenting, and suggestion features. Most importantly, the Version History feature acts as a failsafe, allowing you to roll back weeks of work if a catastrophic change occurs.
- Notion (The Integrated Knowledge Base): Notion’s free tier is incredible for building a second brain. Create a database that links:
- Content Ideas: Filtered by Keyword Difficulty (KD) score.
- Research Notes: With links to the sources.
- Brand Style Guide: A permanent reference for tone, colors, and formatting rules.
10,000-Word Strategy: Break your long article into 10 separate Google Docs (Part 1, Part 2, etc.), all living in the same Notion database card. This makes the project feel less overwhelming and prevents technical lag.
5.2. Time Management and Focus: Protecting Your Writing Flow
The single biggest enemy of the long-form blogger is distraction. Protecting your precious writing time requires specialized tools designed to enforce focus.
Tool 27: Calmly Writer / FocusWriter – The Distraction-Free Editors
Traditional word processors like Microsoft Word are overloaded with distracting menus. Free, minimalist writing apps strip away all unnecessary elements to create a pure writing environment.
- Focus Mode (Calmly Writer): This feature highlights only the sentence or paragraph you are currently typing, fading out the rest of the screen. This extreme focus technique forces your brain to concentrate only on the words being written, vastly improving writing speed and flow.
- Goal Tracking (FocusWriter): Allows you to set daily goals—either a word count (e.g., 1,500 words per day) or a time limit (e.g., 90 minutes of focused writing). Hitting these small goals provides psychological momentum, making the 10,000-word target feel achievable.
Tool 28: StayFocusd / Cold Turkey – The Distraction Blockers
These free browser extensions are the ultimate guards against productivity killers like social media, news sites, and online shopping.
- StayFocusd (Chrome Extension): Allows you to allocate a fixed amount of time per day to “time-wasting” websites. Once your 10-minute limit for Twitter is used up, the site is blocked for the rest of the day. This is a brilliant way to budget your procrastination.
- The Nuclear Option (Cold Turkey Free): For extreme concentration, certain free blockers offer a “Nuclear Option” that completely cuts off access to your customized list of distracting sites for a set period. Once activated, it cannot be undone, forcing you into deep, uninterrupted work sessions.
Tool 29: Toggl Track / Clockify – The Time Trackers
To ensure your productivity system is working, you must measure your time accurately. You need to know how long it actually takes to write 1,000 words versus designing a graphic.
- Simple Timer: These apps provide one-click timers that allow you to categorize and track the time spent on specific tasks (e.g., “Drafting Part 5,” “SEO Research,” “Image Optimization”).
- Free Reporting: The free reports show you where your week’s time went. If you find you spent 40% of your time on “Email Management” but only 20% on “Writing,” you know exactly where to optimize your workflow next week. This data-driven approach is the final, essential tool for scaling your blogging success to professional levels.
🏁 The Pro Blogger’s Conclusion: The Blueprint is Done. Now Build.
If you have navigated the thousands of words contained within this ultimate guide, you are no longer just a blogger—you are a strategist. You have been handed the master blueprint to a zero-cost, high-performance content machine.
We have moved systematically through the five pillars of modern digital success:
- Content: Mastering flawless prose and scalable idea generation with AI and editorial tools.
- Traffic (SEO): Leveraging Google’s own free data (GSC, Keyword Planner) to find low-competition gold.
- Visuals: Creating professional, branded graphics that load lightning-fast using Canva and specialized optimization tools.
- Audience: Building your most valuable business asset—your email list—using generous, free platforms and smart lead capture.
- Workflow: Conquering the chaos of long-form writing with project management boards and powerful focus enforcers.
The single, most expensive mistake a new blogger can make is believing that high quality requires high cost. This guide has definitively proven that the most powerful, essential tools in your arsenal—from Google Search Console to Canva, from MailerLite to Trello—are entirely free to use. Your budget is protected, but the excuses are gone.
Your Final Call to Action: Execution Over Intention
This knowledge is only potential energy. The final tool you need is momentum.
Do not view this article as a reading assignment; view it as a project checklist.
Your mission begins now.
- Claim Your GSC Account: Start by setting up the one non-negotiable tool that connects your blog to the search engine.
- Launch Your Trello Board: Go to Trello right now and start mapping out your next three articles, moving them through the
IdeatoPublishedlists. - Create Your Lead Magnet: Design a simple, irresistible offer in Canva and link it to your free MailerLite landing page.
The shift from aspiring blogger to professional publisher is not marked by your first dollar earned, but by your first system built. Go forth, install these tools, and transform your blogging journey from a hobby into a scalable, sustainable business.